Once again, the school holidays have arrived, and it’s time to get sweaty playing our favourite games before we’re whisked away to some remote camping sites completely screen-free.
This project documents the workflow used to create the work and is intended to serve as both a teaching aid and a personal reminder of key production steps, ensuring that important processes are not forgotten over time.
The project also functions as a record of creative practice, acting as a reflective journal that captures the different stages involved in producing 3D animation. By documenting these workflows, the project supports ongoing learning, reinforces technical understanding, and provides a transparent account of process that can be shared with students and peers to demonstrate how ideas are developed, refined, and realised in practice.
Renderinng
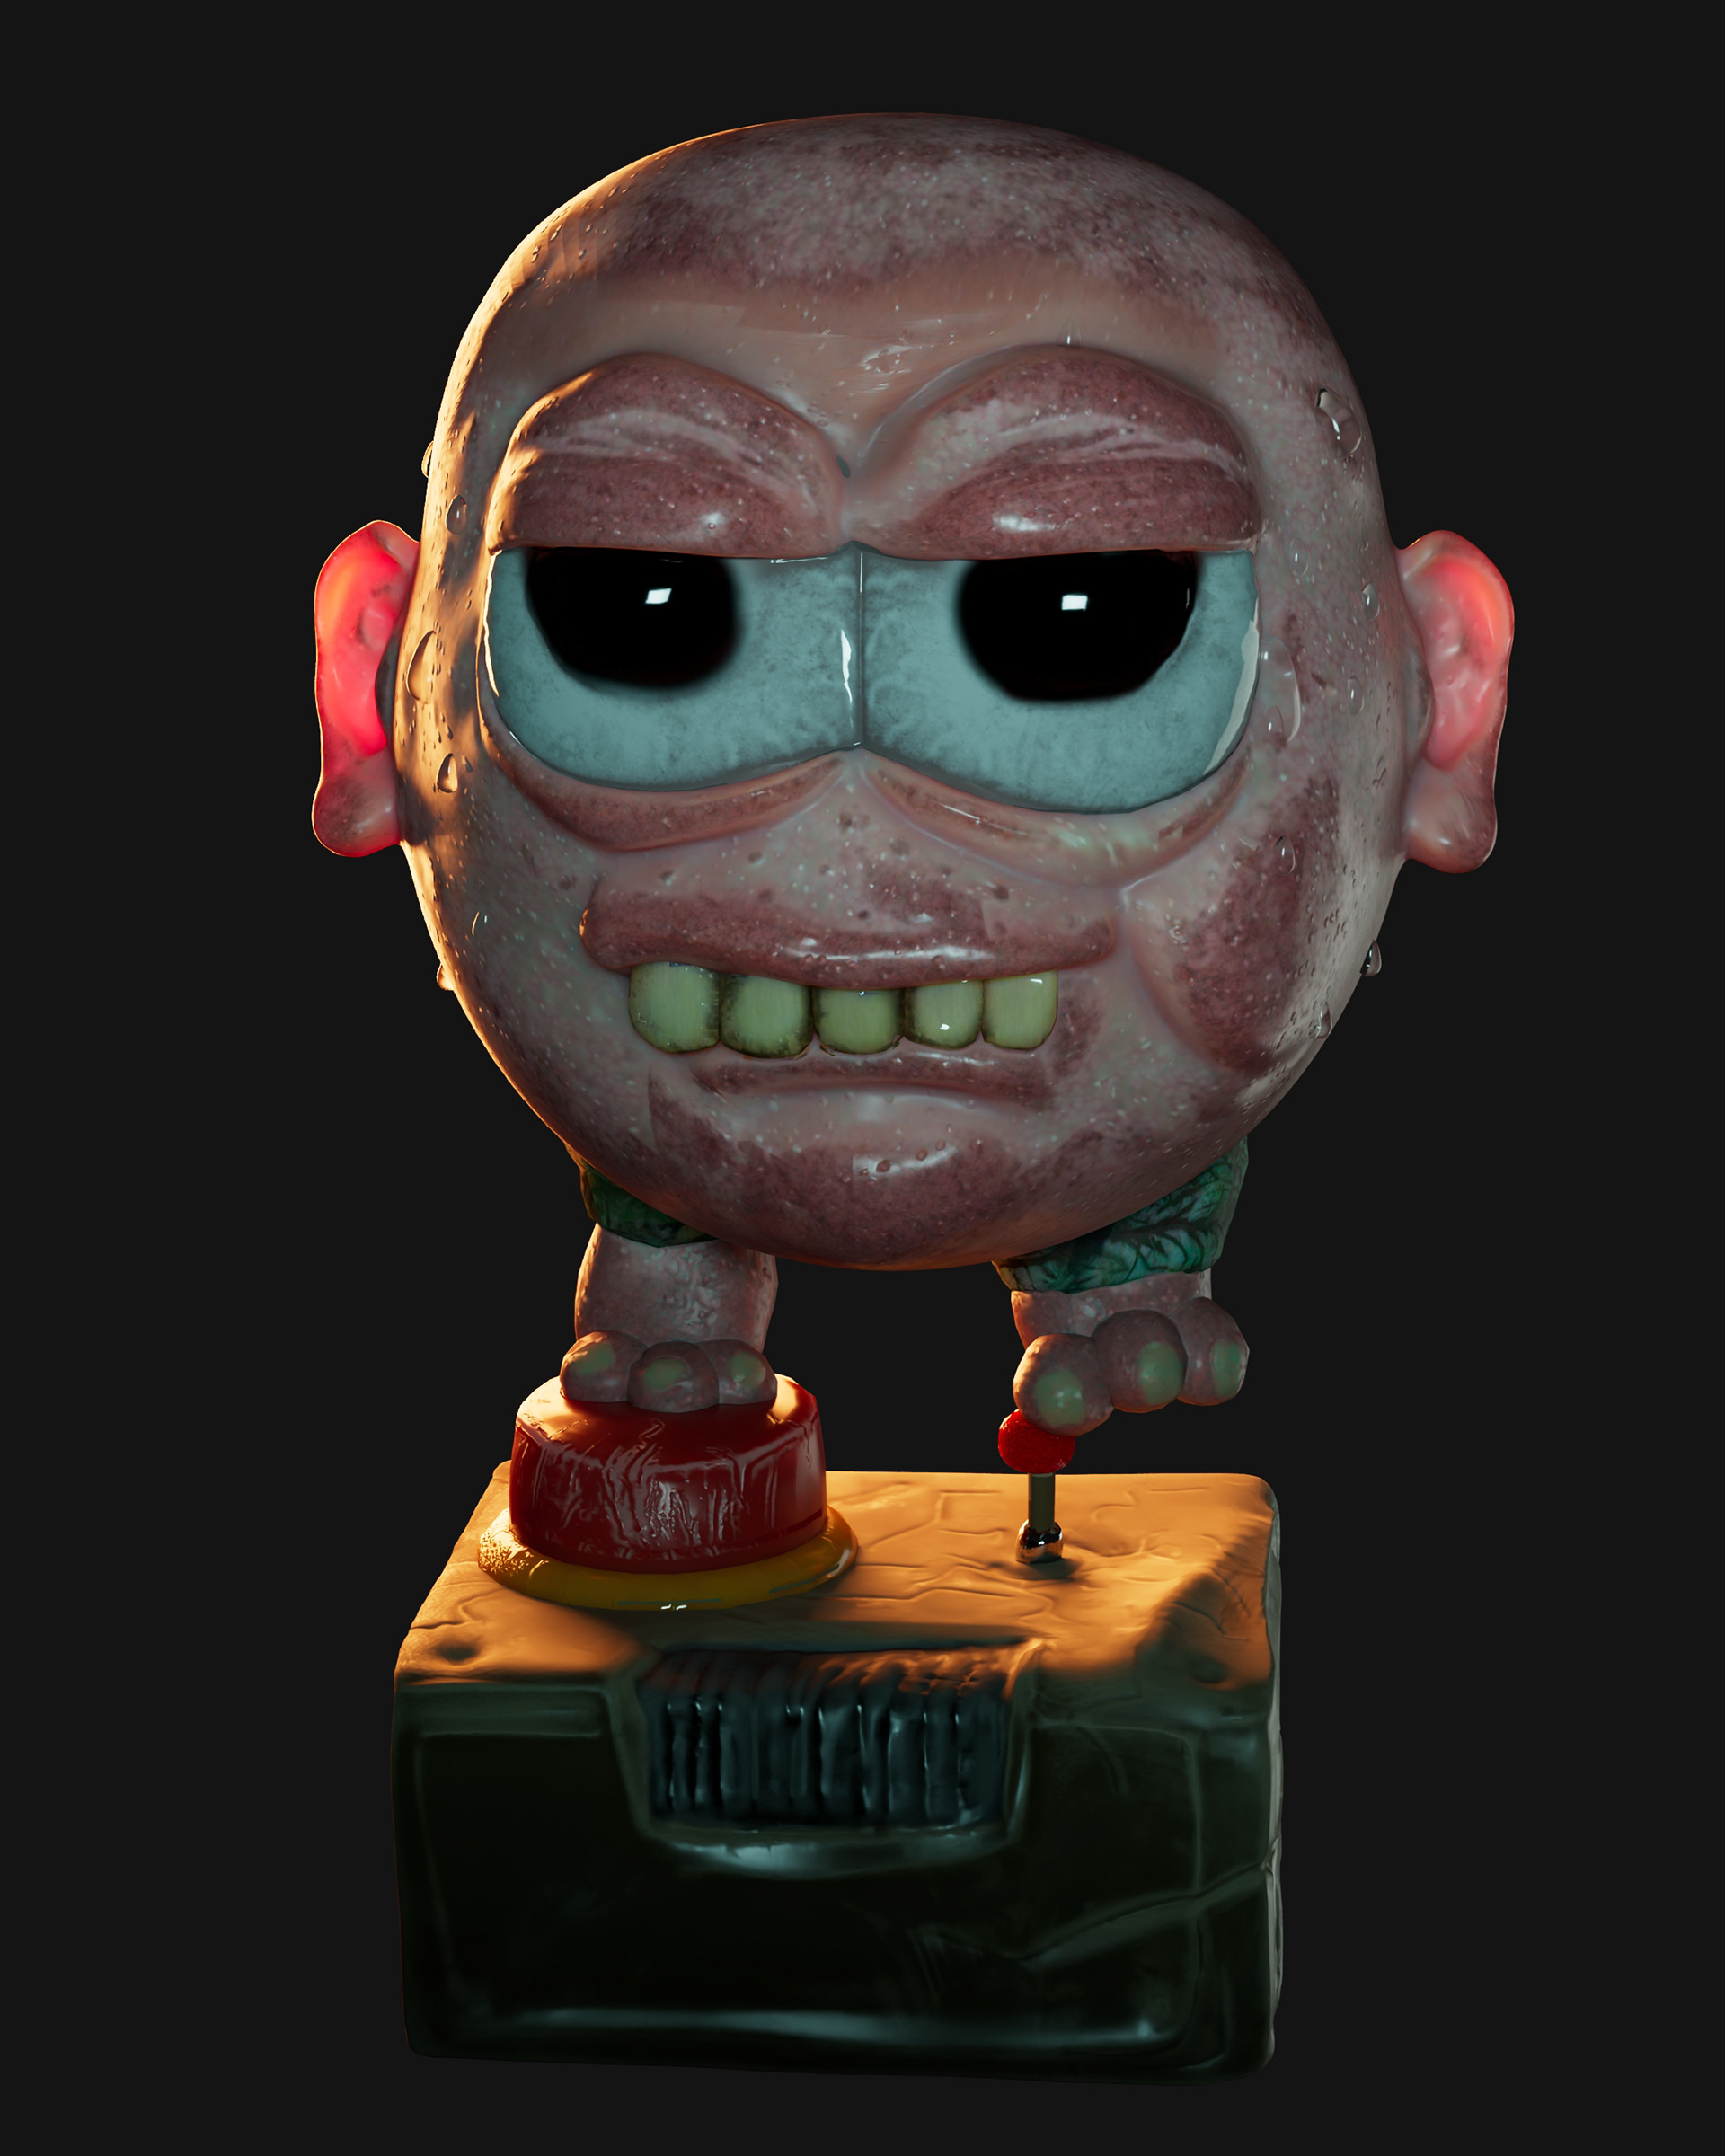
The image above presents the look-development render straight out of the software, with no post-processing applied. It was created using Autodesk Maya and rendered with Arnold at a resolution of 2160 × 2700 pixels. The render time was 2.24 minutes on the CPU, utilising the default Arnold denoiser and standard render settings. Rendering performance was not optimised, as the denoiser enabled rapid lighting and material adjustments without slowing the iteration process.
Textures for this project were authored in Adobe Substance Painter, primarily using default Smart Materials, with additional masking and paint layers applied where required. The texture set includes base colour, roughness, and normal maps, all connected to a PBR Maya Standard Surface shader. Subsurface scattering was also employed by routing the base colour map into the subsurface colour input, increasing saturation relative to the original colour map, and adjusting the subsurface radius to achieve the desired depth. For the head, a saturated orange-red subsurface colour was used with a depth value of 2, allowing light from the warm rim light to subtly transmit through the ears from behind.

Creative Pratice Proces
The creative process began with the exploration of concepts developed as part of my emoji project. This work draws upon my personal experience both as a gamer and as a father of two young boys who readily immerse themselves in their favourite video games. Observations of their engagement with play and digital interaction informed the tone and visual direction of the project. At the same time, the work reflects my own gaming history, represented through the retro joystick controller—a reference to the controller I used with my early home computing experiences on the Commodore Amiga.
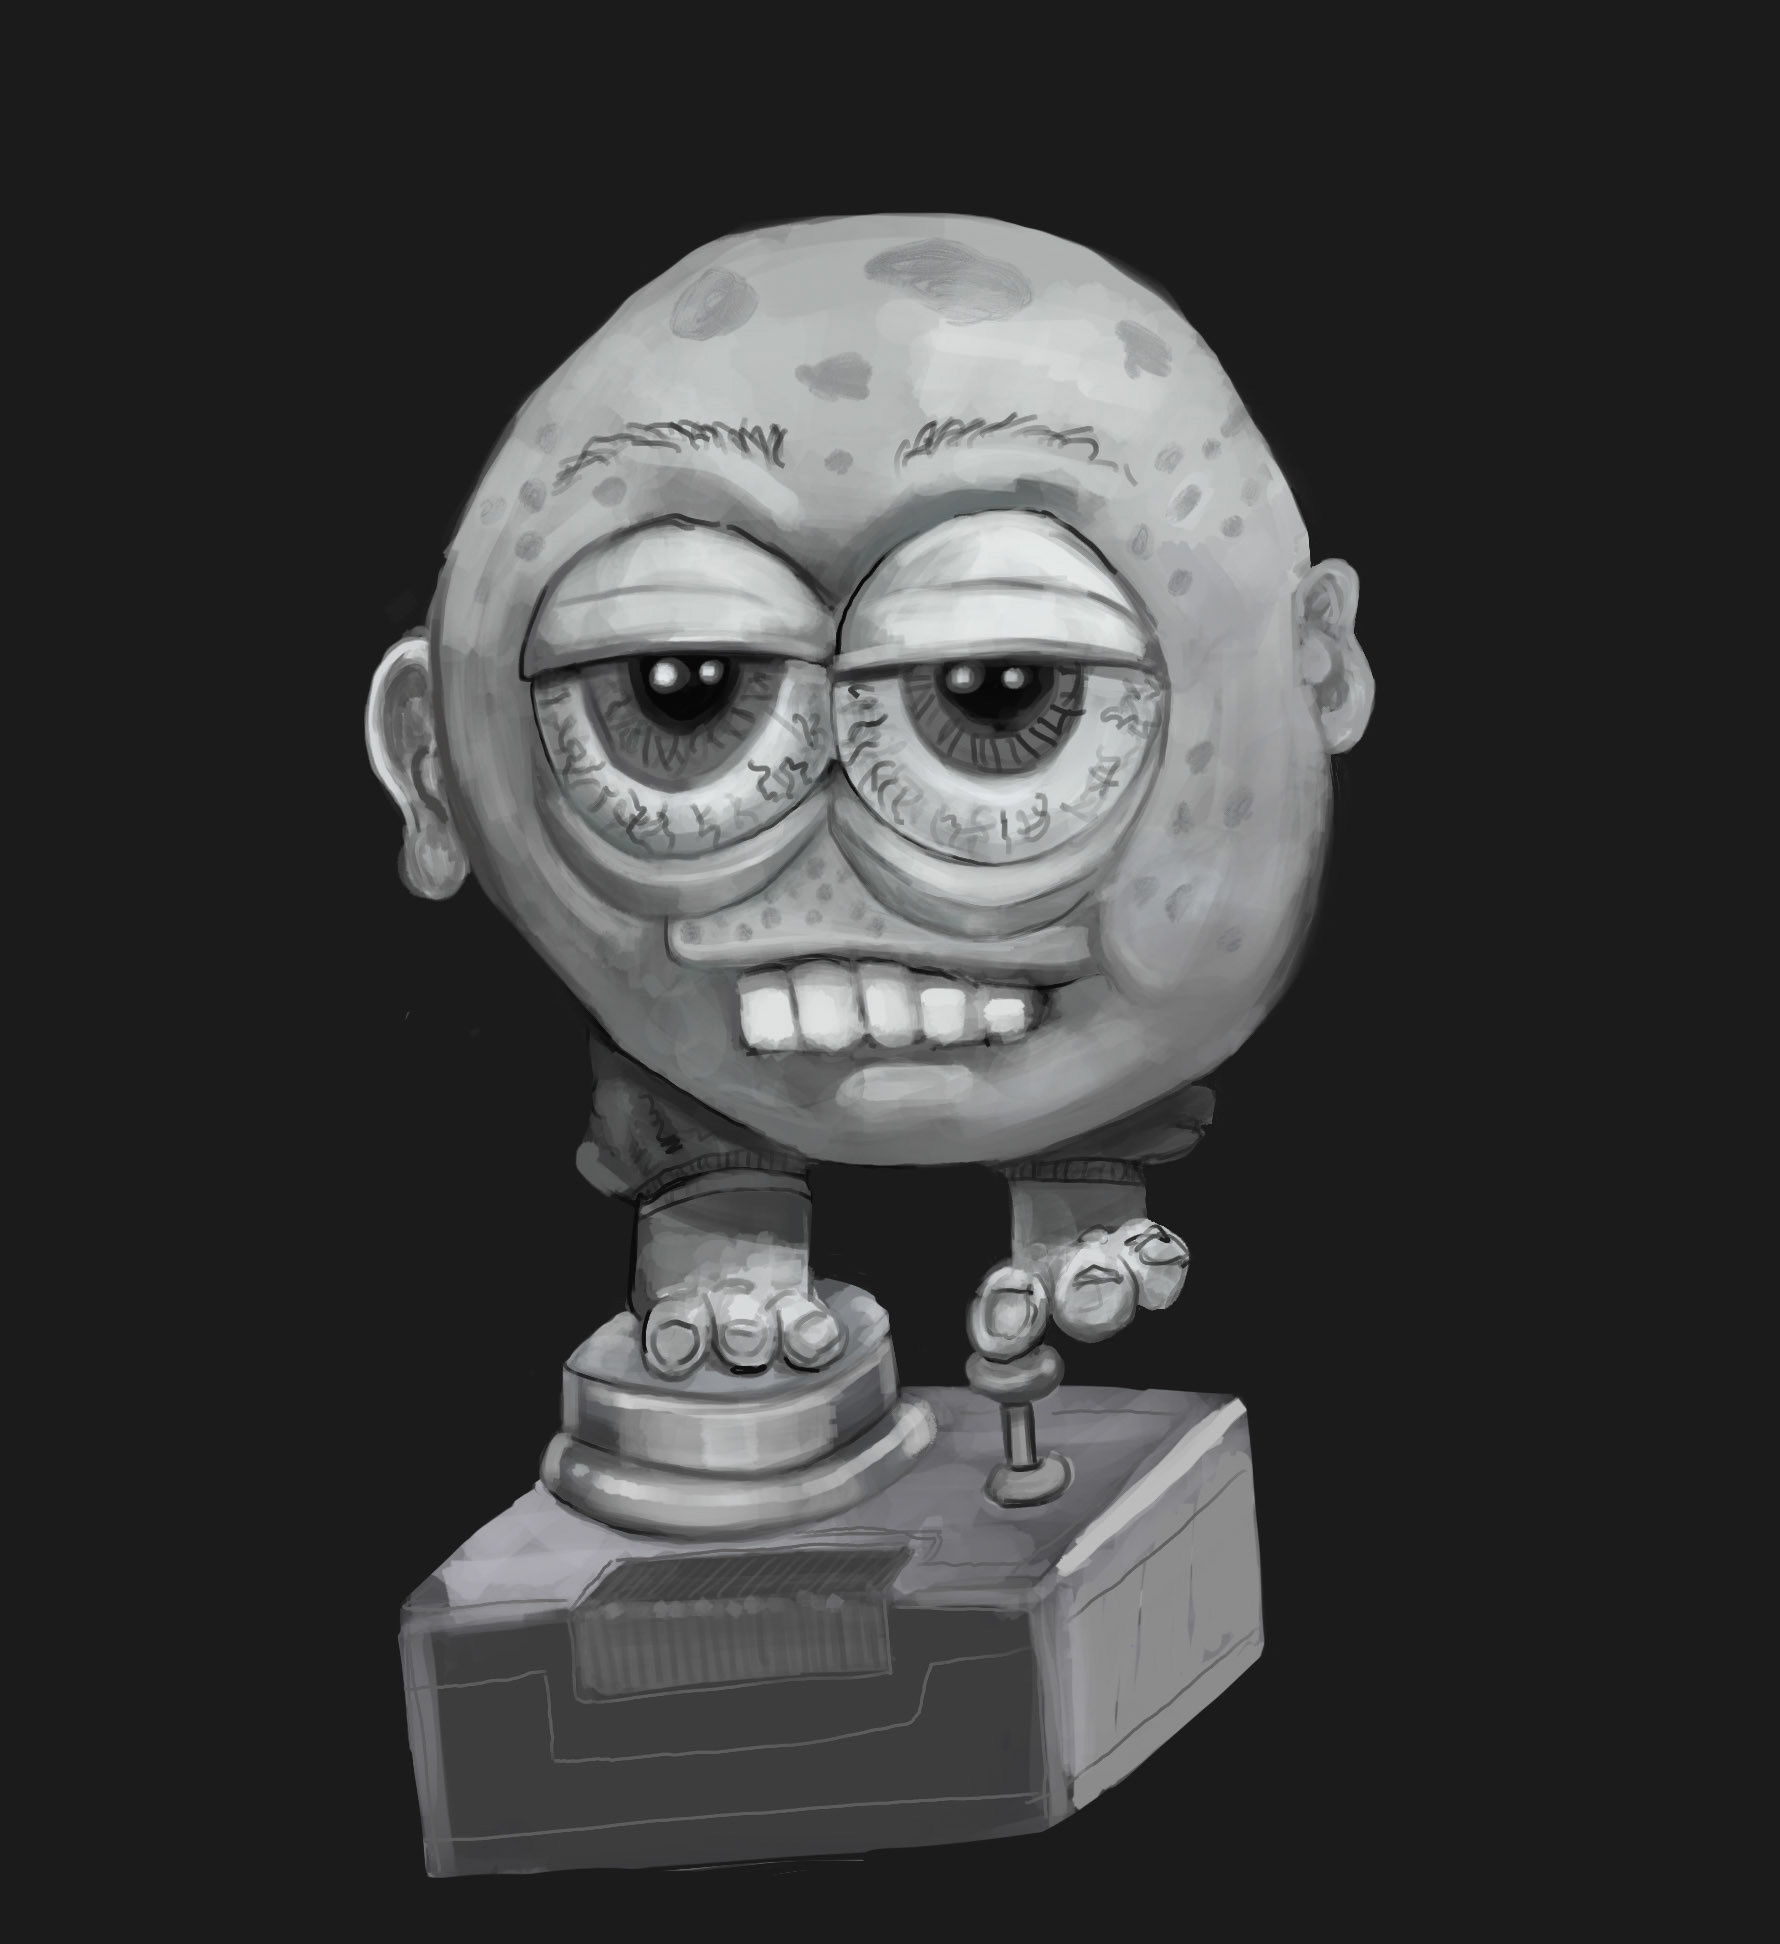
The idea initially emerged as a hand-drawn sketch on paper created some time ago. This sketch was later refined and expanded into a more detailed greyscale digital painting, produced on an iPad using the Procreate drawing application.
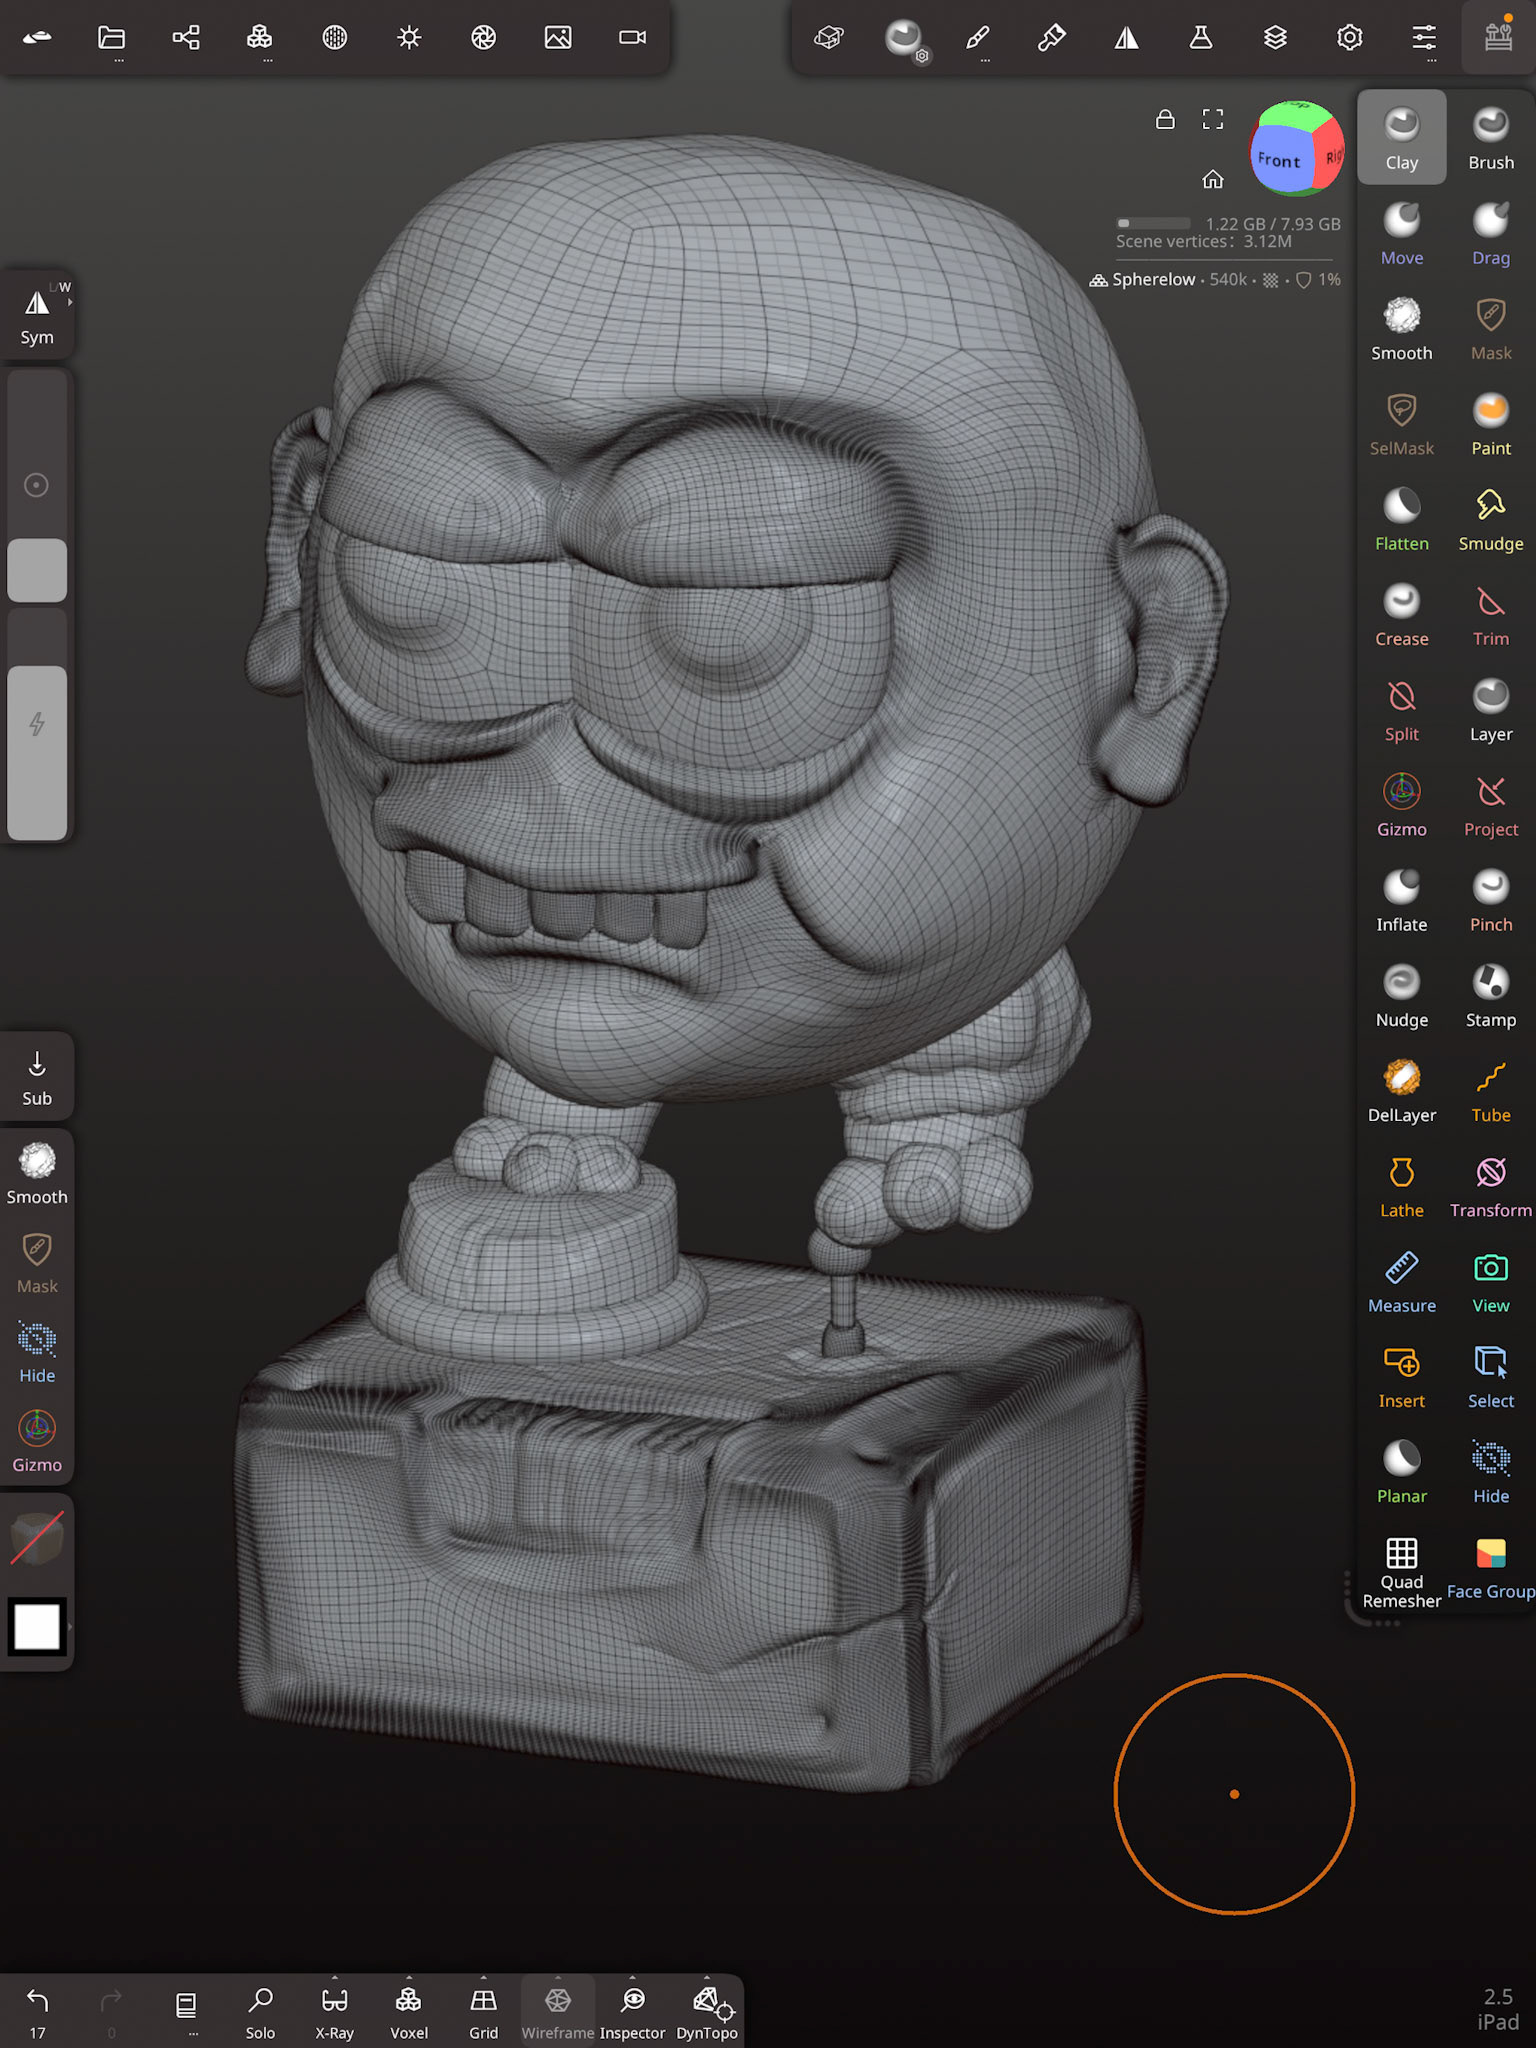
Modelling Process Sculpting in Nomad Sculpt
The project was modelled using an iPad and Nomad Sculpt. The modelling process drew upon the earlier digital painting as a visual reference, with the character developed as a high-resolution sculpt within Nomad Sculpt. The workflow began by blocking out the main forms using separate primitive shapes, which were then refined using the Clay brush to establish the overall structure. DynTopo was employed to dynamically add topology as needed during the sculpting process. Additional surface detail was introduced using the Crease brush in both normal and inverted modes, while the Flatten brush was used to create sharper, more defined edges, particularly around areas such as the lower eyelids.
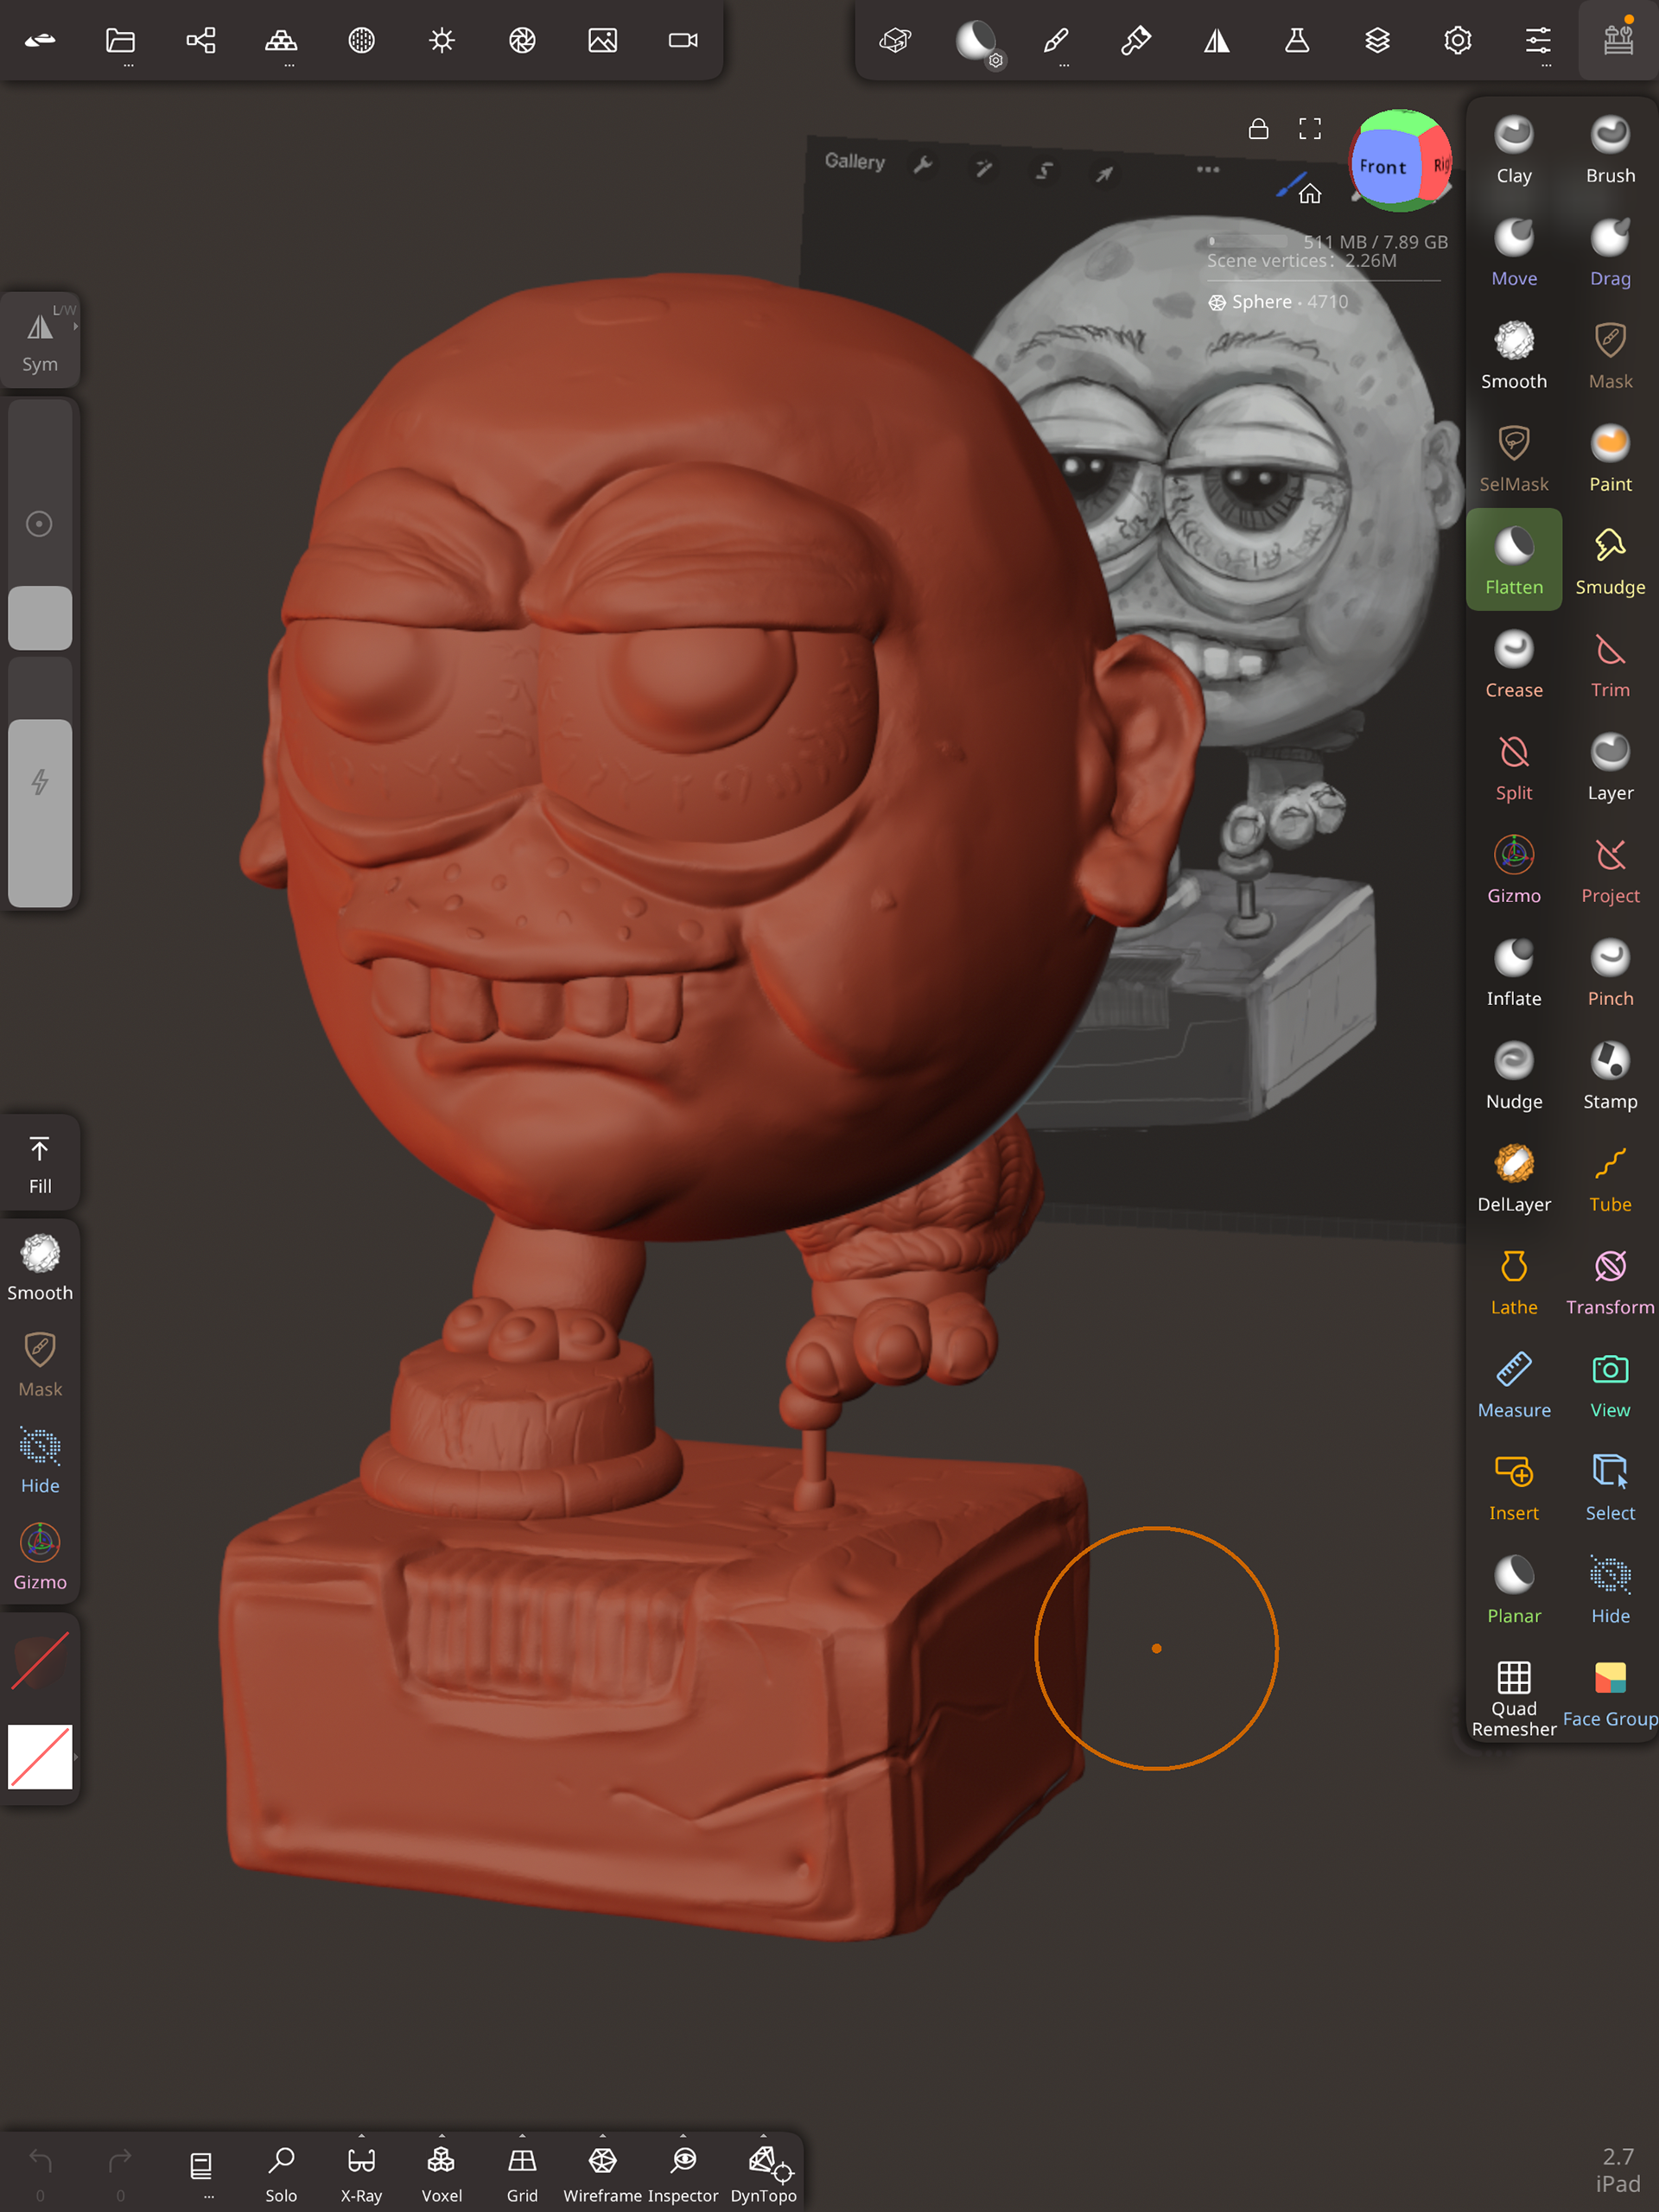
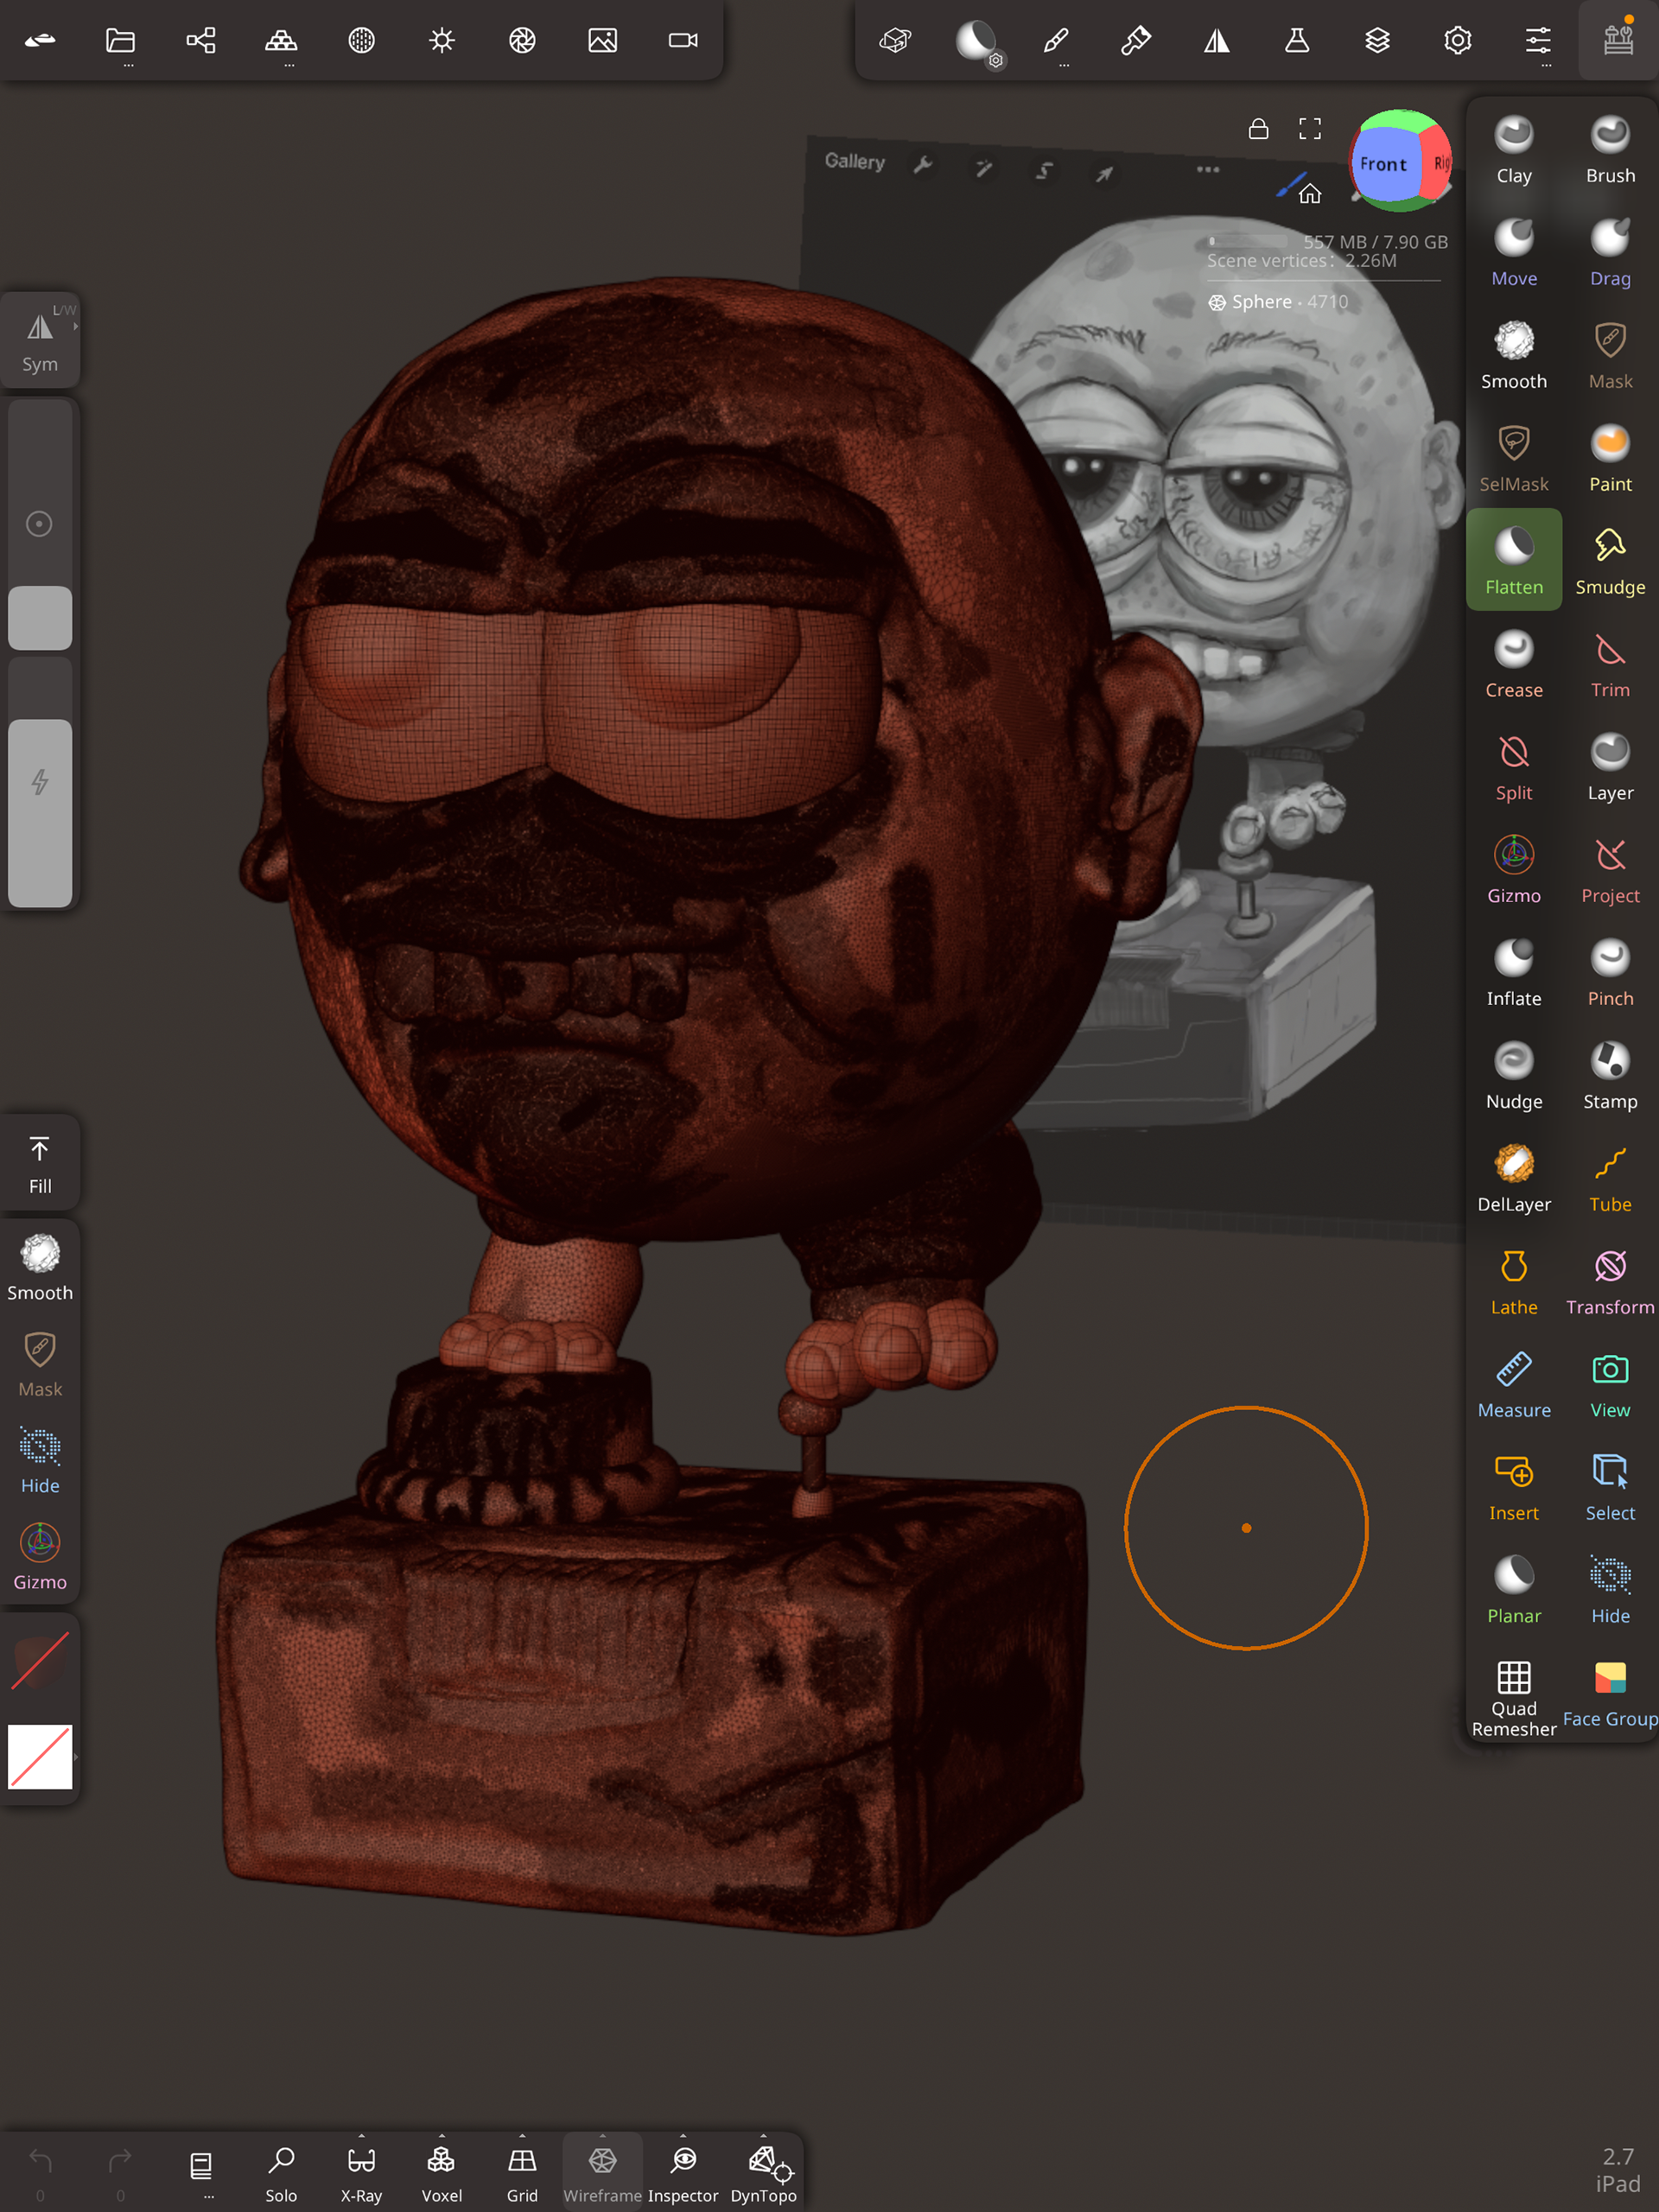
High-resolution sculpts with over 3.5 million faces.

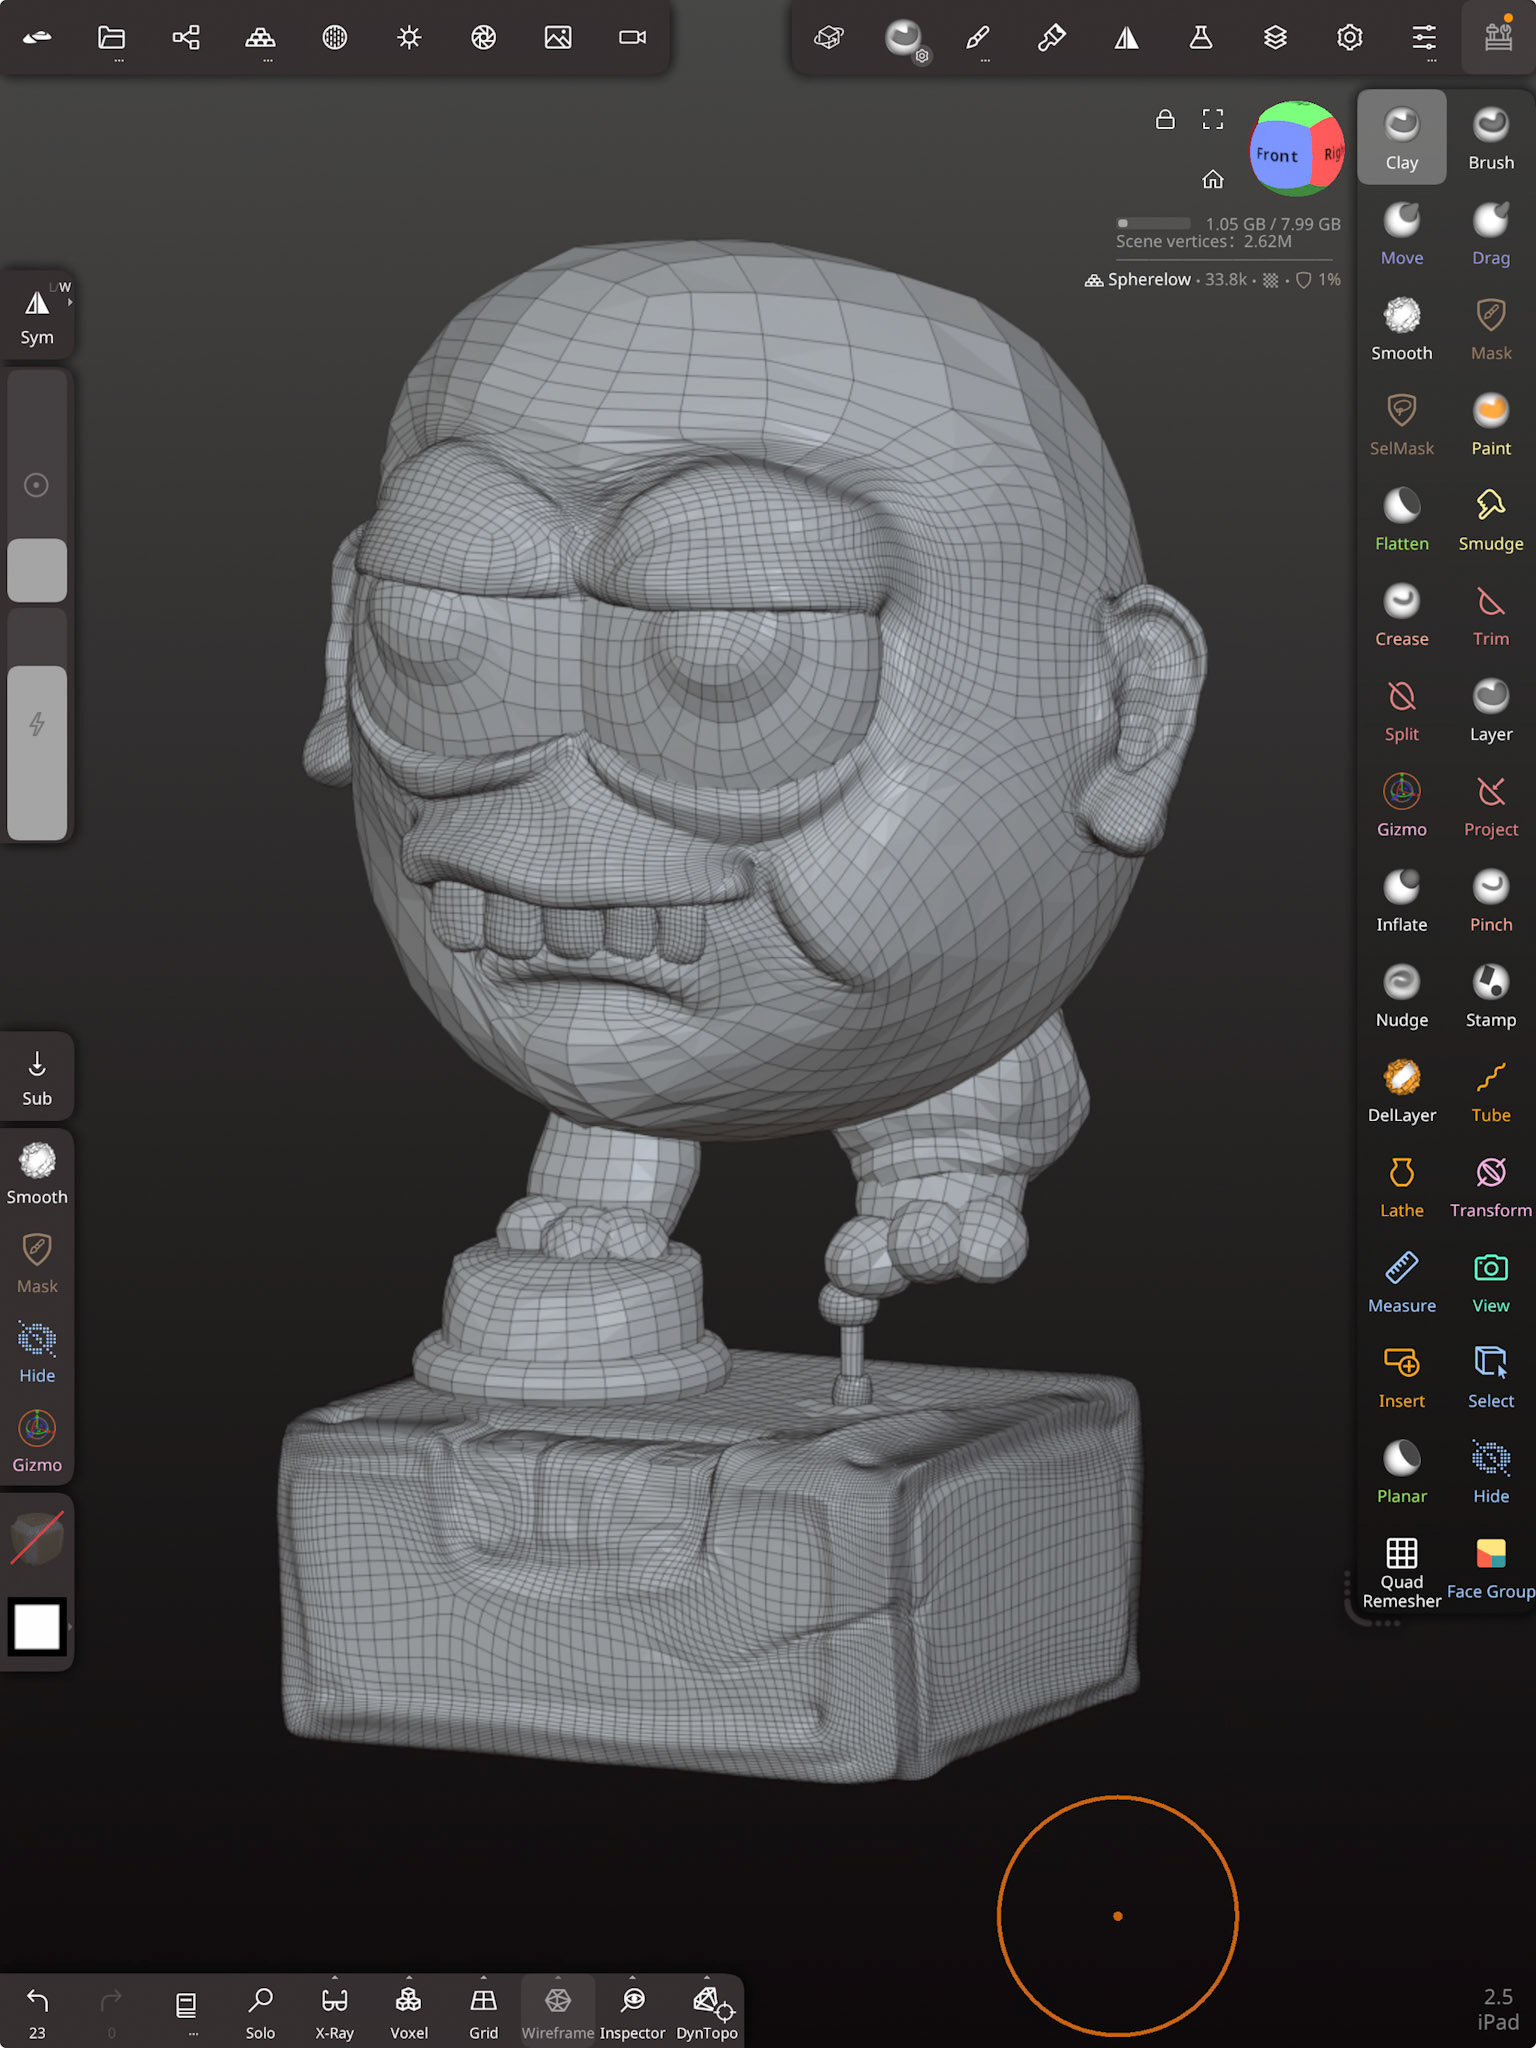
Creating low and high polygon mesh
Within Nomad Sculpt, the Quad Remesher add-on was used to optimise topology. Quad Remesher add-on available as a one-off purchase of approximately $25 AUD, which is significantly lower than the PC version.The remeshing process involved controlling polygon density and edge flow by painting values directly onto the model using the Dot Density brush, along with the use of surface guides to influence typlogical flow of the faces.
Method 1: Direct Duplication and Remeshing
The sculpt was duplicated and renamed as the low-polygon mesh. Quad Remesher was then applied at approximately 50% (half resolution), reducing the model to around 30,000 faces. Under the Misc menu, Reproject → Vertex was used, ensuring the Vertices option was enabled to accurately transfer detail from the high-resolution sculpt.
Method 2: Progressive Remeshing with Multiresolution
Alternatively, the high-resolution sculpt was duplicated without applying Quad Remesher and renamed as the low-polygon mesh. Quad Remesher was then applied using the recommended target range (5,000–10,000 faces; in this case approximately 35,000 faces). A UV map was generated using Unwrap → UVAtlas, located under Misc. The mesh was then subdivided using Multiresolution, followed by Reproject → Vertex (with Vertices enabled). This process was repeated multiple times (approximately five passes) to progressively recover surface detail. Once complete, additional sculpting refinements could be applied to the mesh.
Regardless of the method used to generate the high- and low-polygon meshes, the final step involved exporting both versions as FBX files. These were then imported into Autodesk Maya to prepare the assets for texture baking in Adobe Substance Painter.
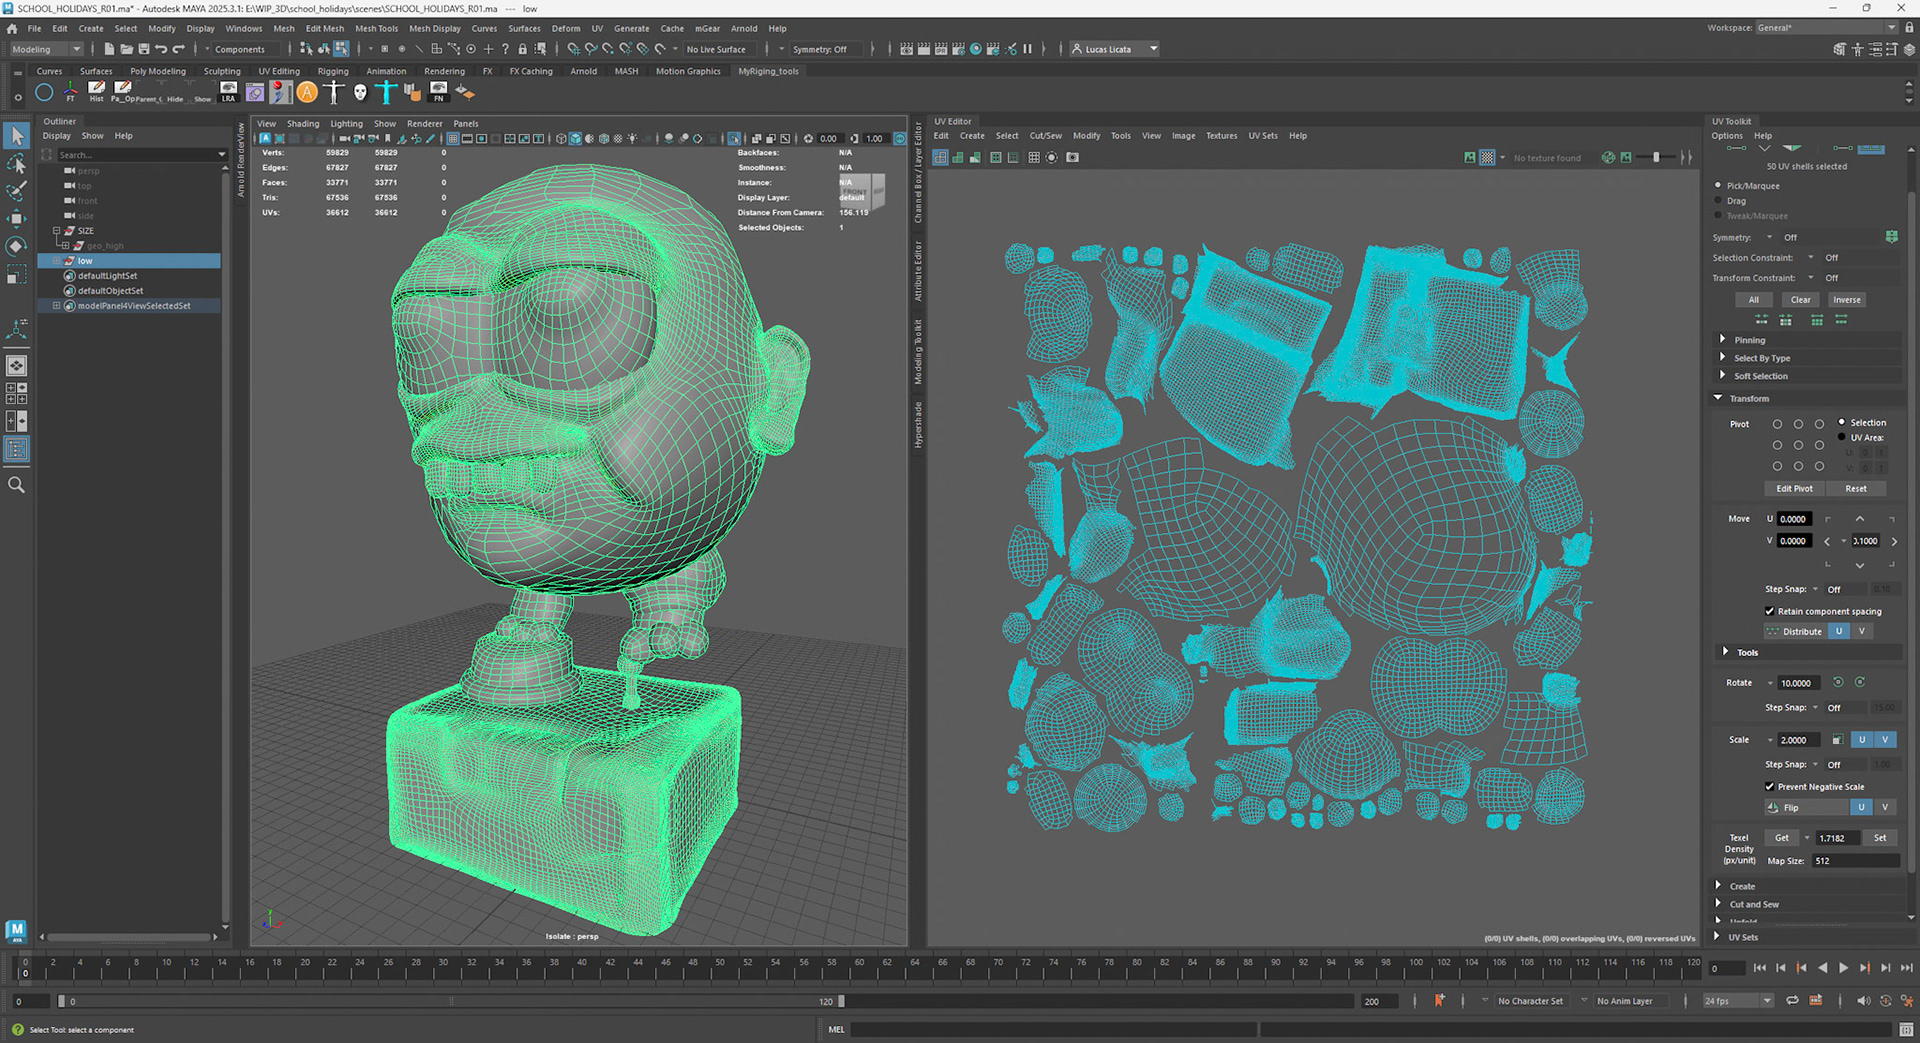
Preparing the Mesh in Maya for Export to Substance
The models were imported into Autodesk Maya as OBJ exports from Nomad Sculpt. Upon import, the scale was adjusted by a factor of ×100 on the X, Y, and Z axes, and the model was translated +100 units on the Y axis to correctly position it within the scene. This was achieved by grouping the object, applying the translation to the group node, then deleting history and freezing transformations on the translated group before ungrouping.
UVs were then checked using the UV Editor, with Shaded UV Shell View enabled to ensure all shells were correctly oriented and facing the proper direction. At this stage, a decision was made to either consolidate all UVs into a single UV map or to create UDIMs. For more complex models, UDIMs are preferred, as they provide greater flexibility and higher texture resolution. Custom UV layouts were also favoured, as they allow for easier UV shell selection and more efficient masking workflows within Substance Painter.
Materials were assigned to the different surfaces and named appropriately, either at the face level or mesh level. Where possible, UVs intended to share the same material were consolidated into a single UDIM. Maintaining consistent texel density across all UVs was considered important, and in some cases, multiple materials shared a single UDIM to ensure visual consistency.
This approach generates separate texture sets in Substance Painter based on material assignments, resulting in individual texture maps for each material. Alternatively, a low-polygon mesh with a single material can be exported and textured using multiple masks within Substance Painter. This workflow is demonstrated in the Pac-Man project on my website. ( add link here )
Finally, both the low- and high-polygon meshes were exported to Substance Painter as FBX files. Prior to export, all meshes had their history deleted and transformations frozen. It is important to note that the high-polygon mesh does not require matching UVs to the low-polygon mesh for the baking process.
Substance Painter Workflow
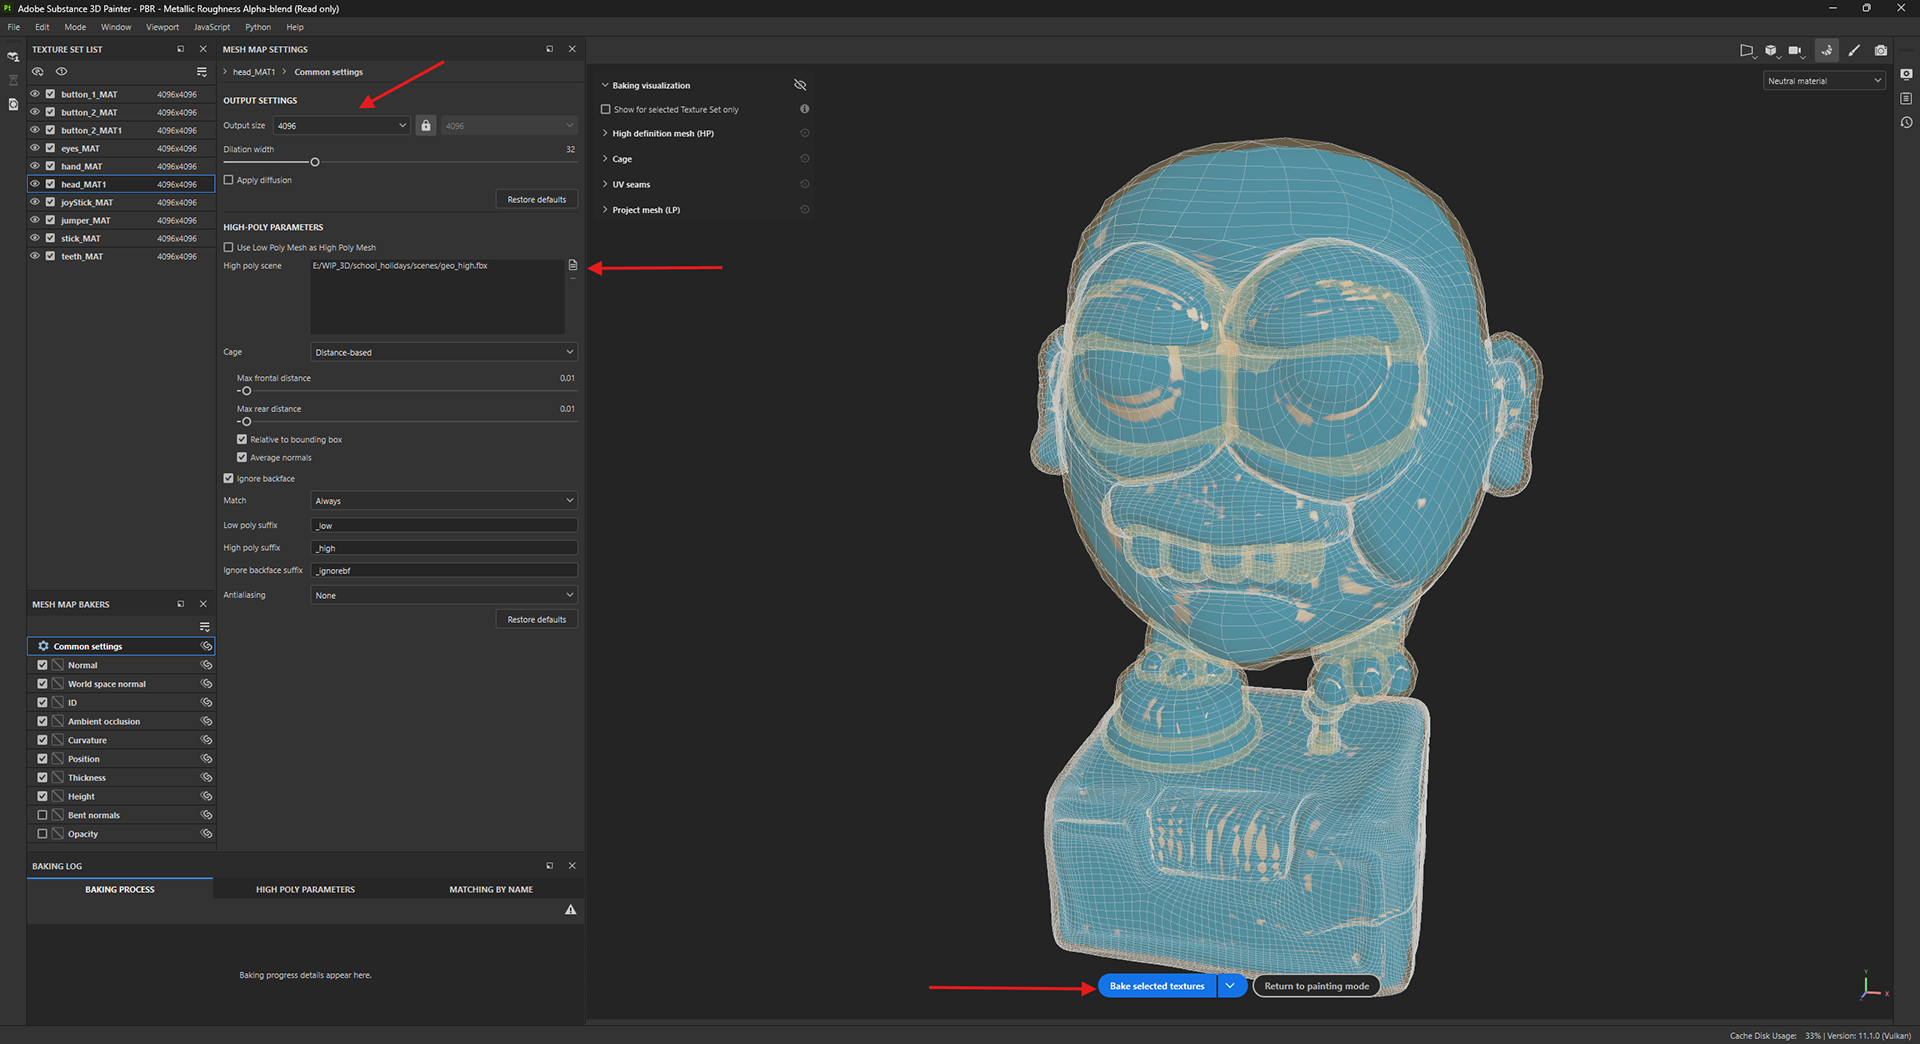
Baking mesh maps is a critical step in the texturing pipeline, as it allows high-resolution sculpted detail—such as surface curvature, ambient occlusion, and fine form definition—to be transferred onto a lower-polygon mesh in the form of texture maps. This process enables the model to retain visual richness while remaining performance-efficient for real-time rendering, animation, or game-engine use. Mesh maps also provide essential data that drives smart materials and masks within Substance Painter, significantly improving consistency, realism, and iteration speed during the texturing process.
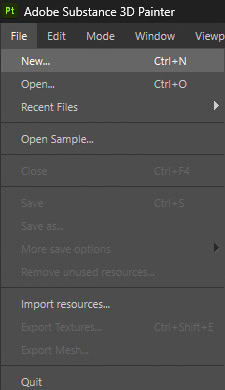
Adobe Substance Painter was selected for this workflow due to its industry-standard physically based rendering (PBR) approach, non-destructive layer system, and tight integration with common 3D pipelines. Substance Painter allows materials to respond accurately to lighting conditions while supporting rapid iteration through smart materials, generators, and mask-based workflows—making it particularly well-suited for both teaching and production contexts.
To begin, a new project was created in Substance Painter via the File menu. In the project settings, the PBR Metallic/Roughness workflow was selected, with the document resolution set to 4K. The Normal Map format was set to OpenGL, and the low-polygon mesh was assigned as the project mesh.
Baking Mesh Maps in Substance Painter
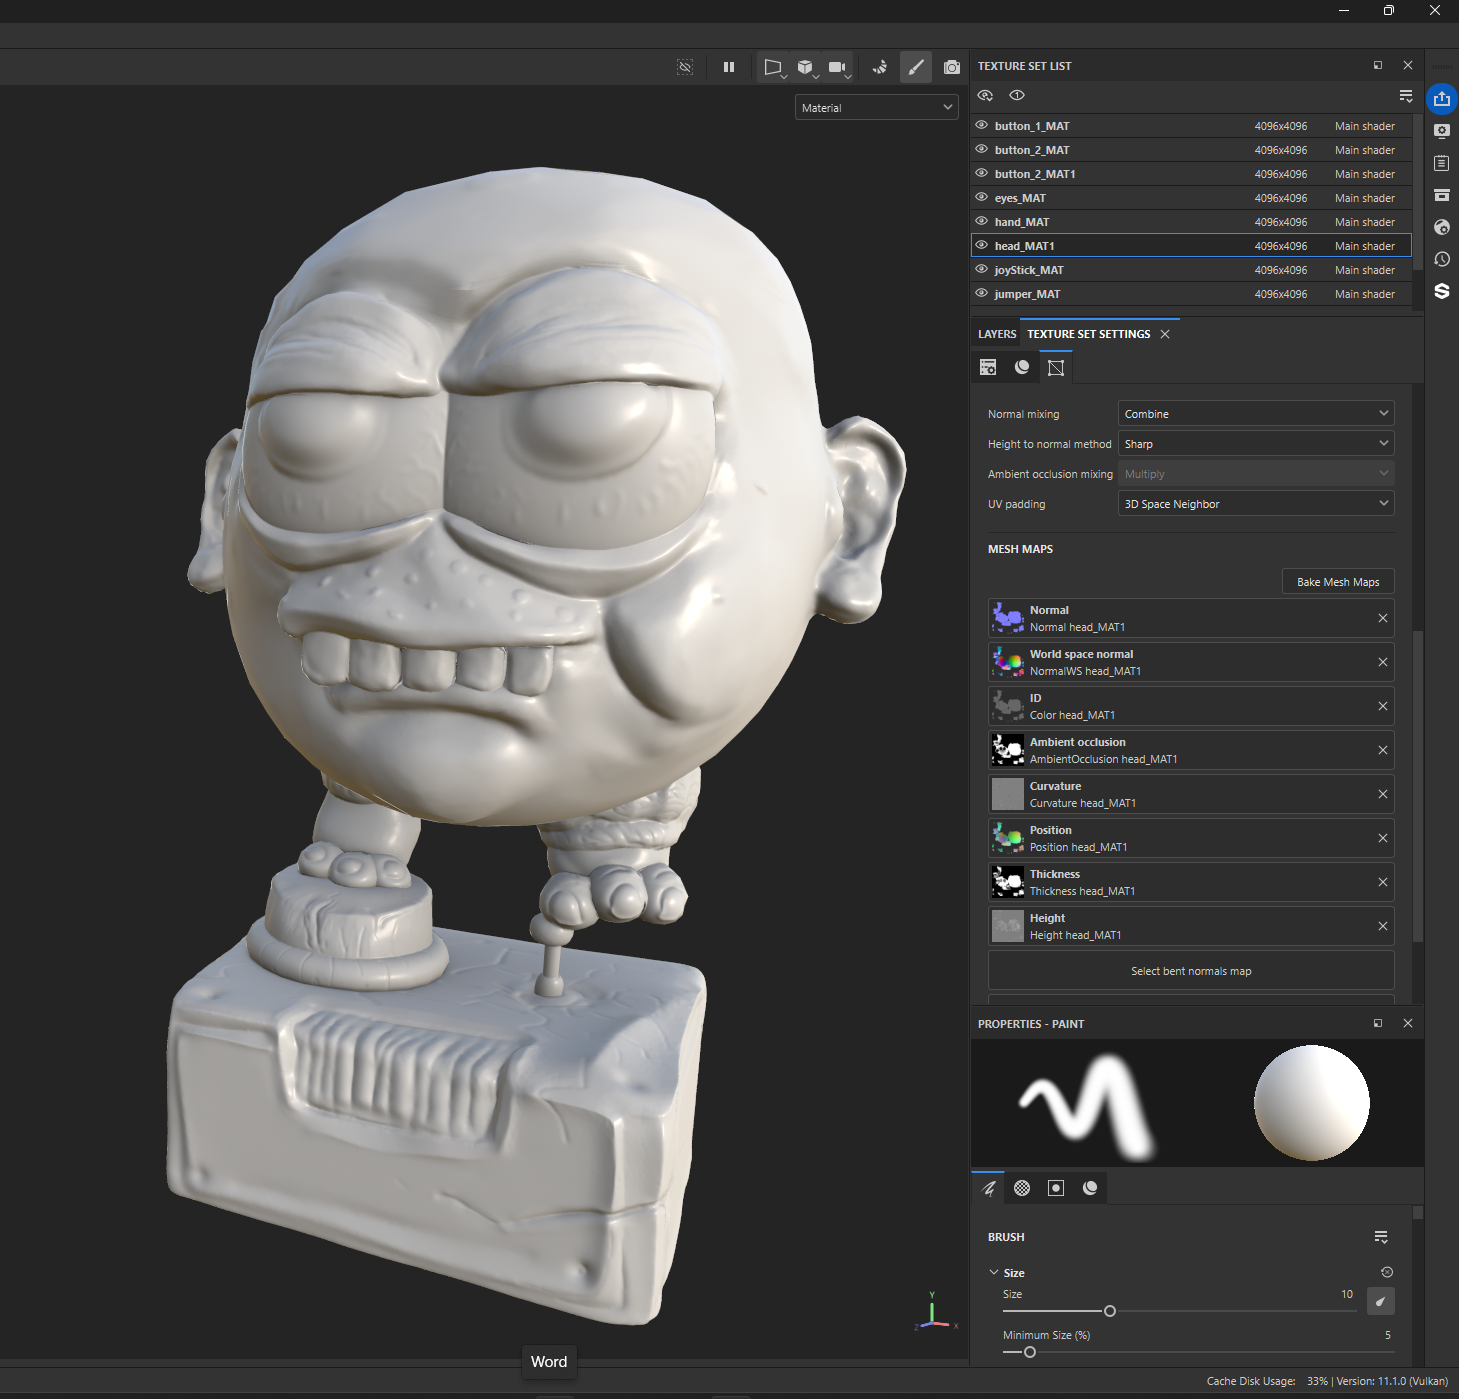
Mesh maps are generated by baking information from the high-polygon model onto the low-polygon mesh. These maps store essential surface data that drives material behaviour, shading accuracy, and mask generation within Substance Painter. They enable the low-polygon model to visually represent the detailed form and surface qualities of the original high-resolution sculpt without additional geometry.
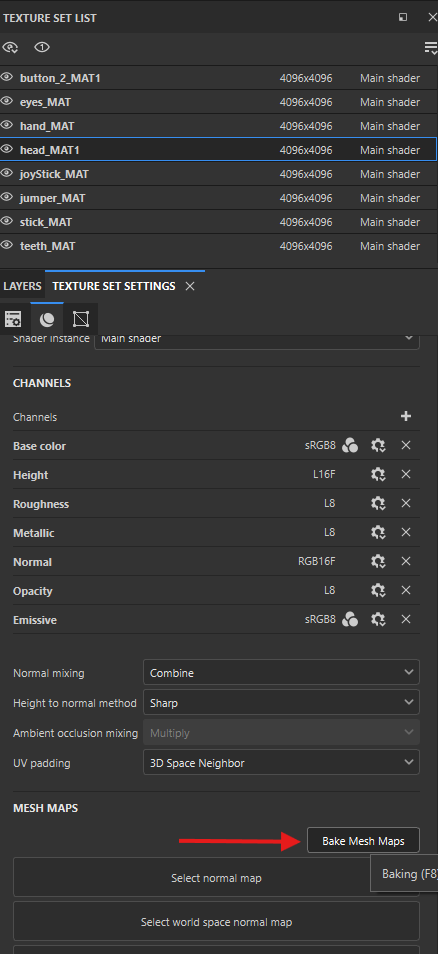
The key mesh maps generated during the baking process include:
Normal Map – transfers high-resolution surface detail, such as fine sculpted forms, onto the low-polygon mesh to enhance perceived detail.
Ambient Occlusion (AO) – simulates soft shadowing in recessed areas, helping to ground the model visually.
Curvature – detects convex and concave edges and is commonly used to drive edge wear, dirt, and smart material effects.
World Space Normal – stores normal direction information in world space and is used by generators and advanced masking operations.
Position – encodes spatial height information and is useful for gradient-based effects such as dust buildup or colour variation.
Thickness – estimates object thickness and supports effects such as subsurface scattering and translucency.
To bake the mesh maps, navigate to Texture Set Settings → Mesh Maps, then select Bake Mesh Maps. Set the output resolution to 4K, load the high-polygon mesh into the corresponding slot, and click Bake Selected Textures to generate the required maps.
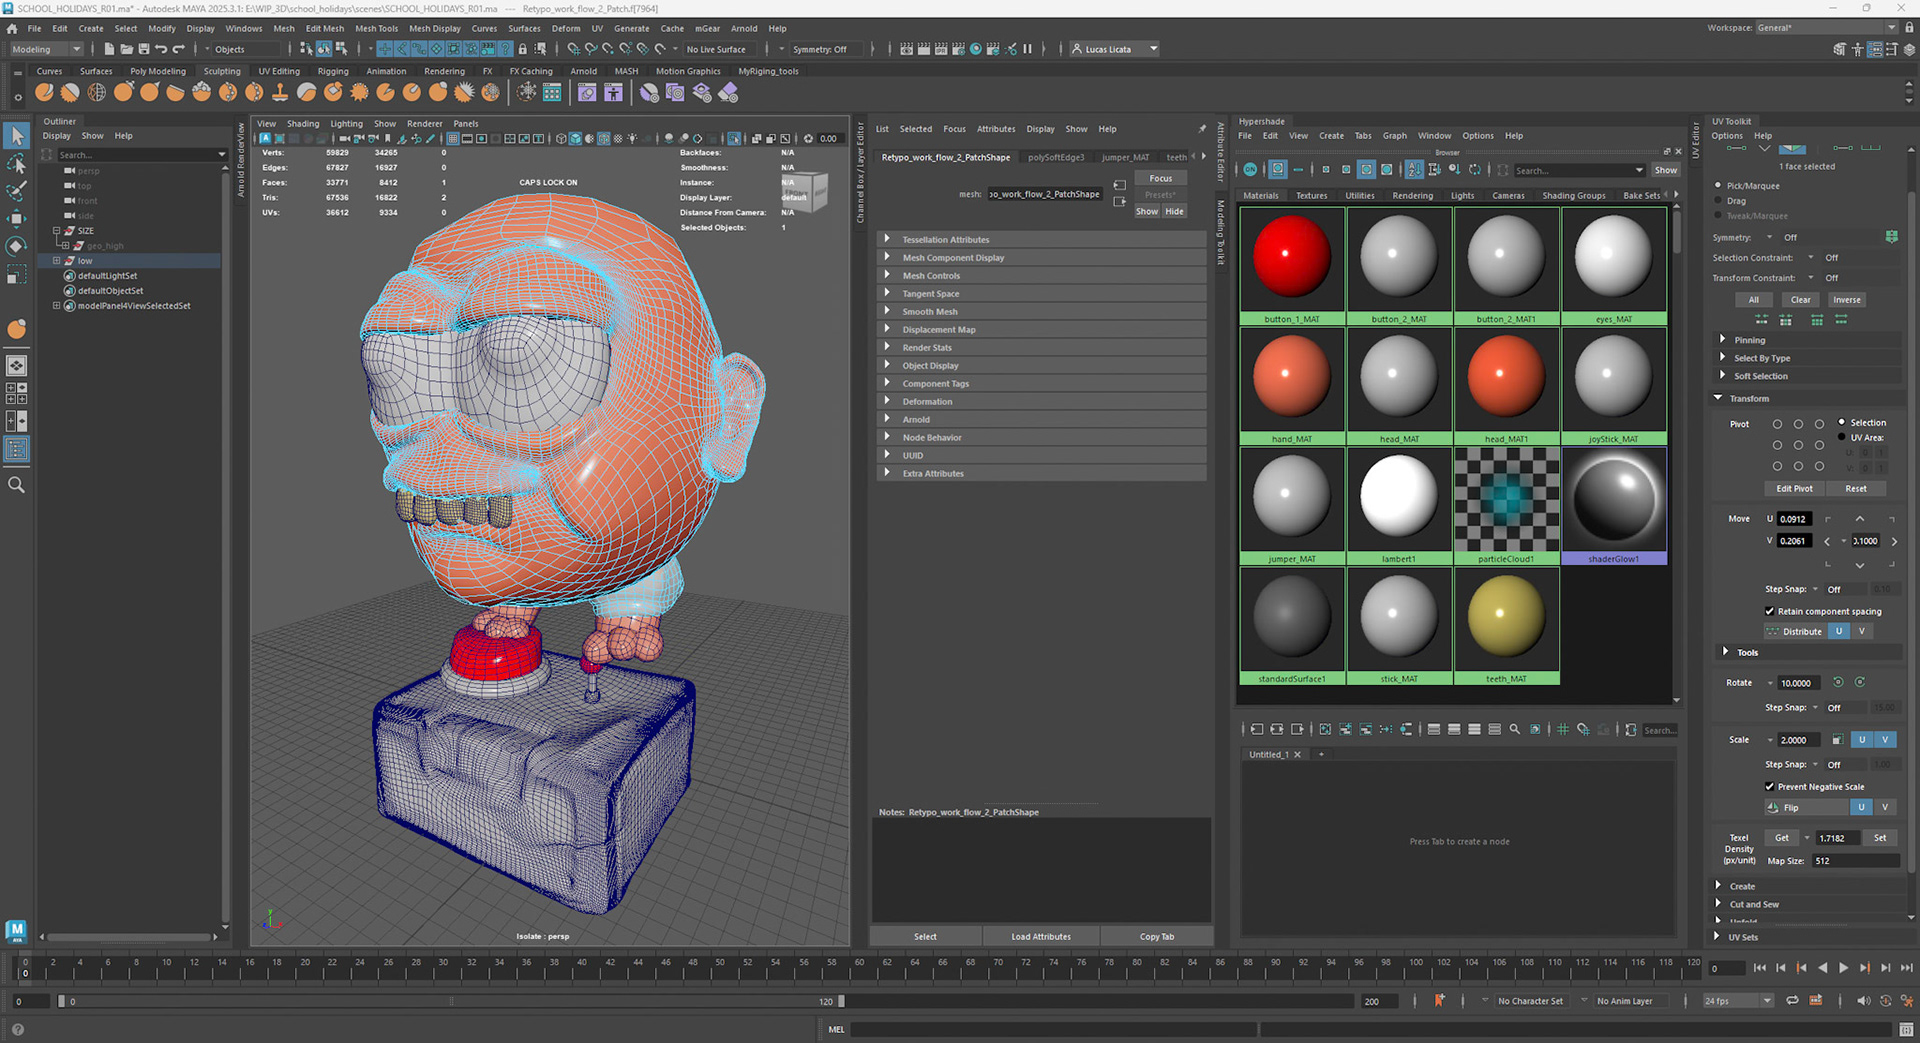
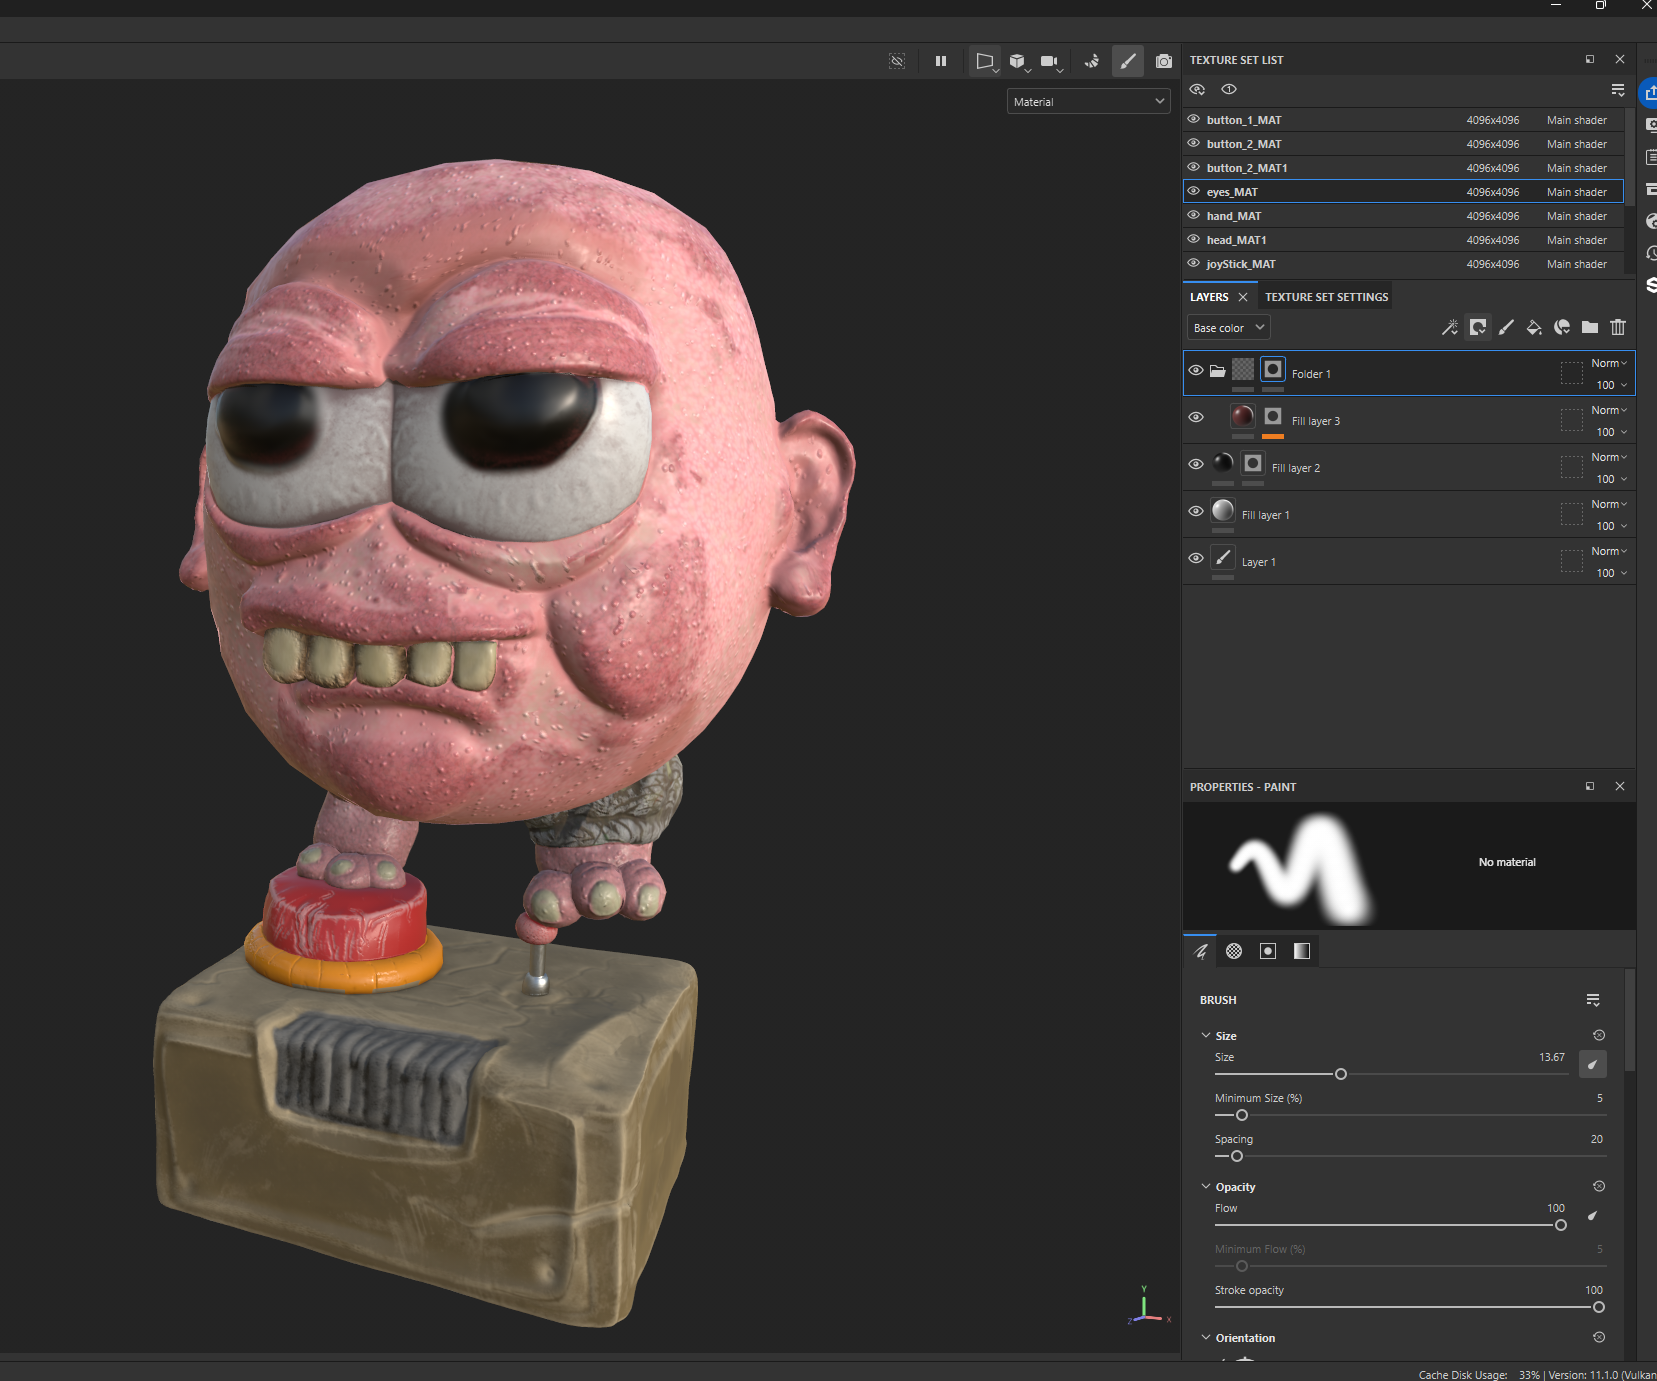
Texture Sets, Smart Materials, and Masking in Substance Painter
In Substance Painter, texture sets are created based on the materials assigned to the model prior to import. Each unique material name generates a separate texture set, allowing different parts of the model to be textured independently while remaining within a single project. This structure enables greater control over resolution, material complexity, and export settings, particularly for models with multiple surface types.
Smart materials are pre-built, procedural material systems that respond dynamically to the baked mesh maps. They use data such as curvature, ambient occlusion, and world space normals to automatically generate realistic surface effects, including edge wear, dirt accumulation, and surface variation. Smart materials are applied non-destructively and can be customised by adjusting parameters such as colour, roughness, metallic values, and wear intensity, allowing for rapid iteration while maintaining physical accuracy.
The masking system in Substance Painter enables precise control over where materials and effects appear on the model. Each layer or smart material can have an associated mask that defines its visible areas. Masks can be created and refined using a combination of tools, including polygon and UV shell selection, hand painting, and procedural generators. Generators rely on baked mesh maps such as curvature and position to create context-aware masks that automatically adapt to the geometry of the model. Additional control can be achieved by stacking fill layers, paint layers, and generators within a mask, allowing complex surface interactions to be built up in a flexible and non-destructive manner.
Together, texture sets, smart materials, and masking form a powerful workflow that supports efficient, scalable, and industry-aligned texturing practices for both real-time and offline rendering pipelines.
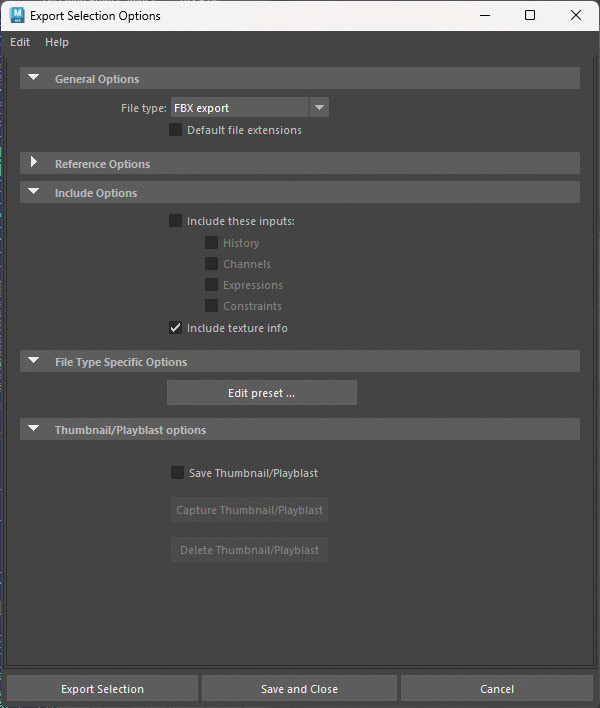
Baking Textuers from Substance
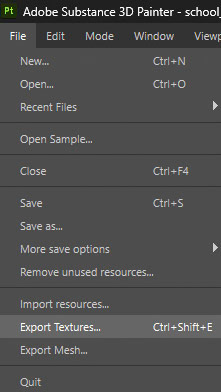
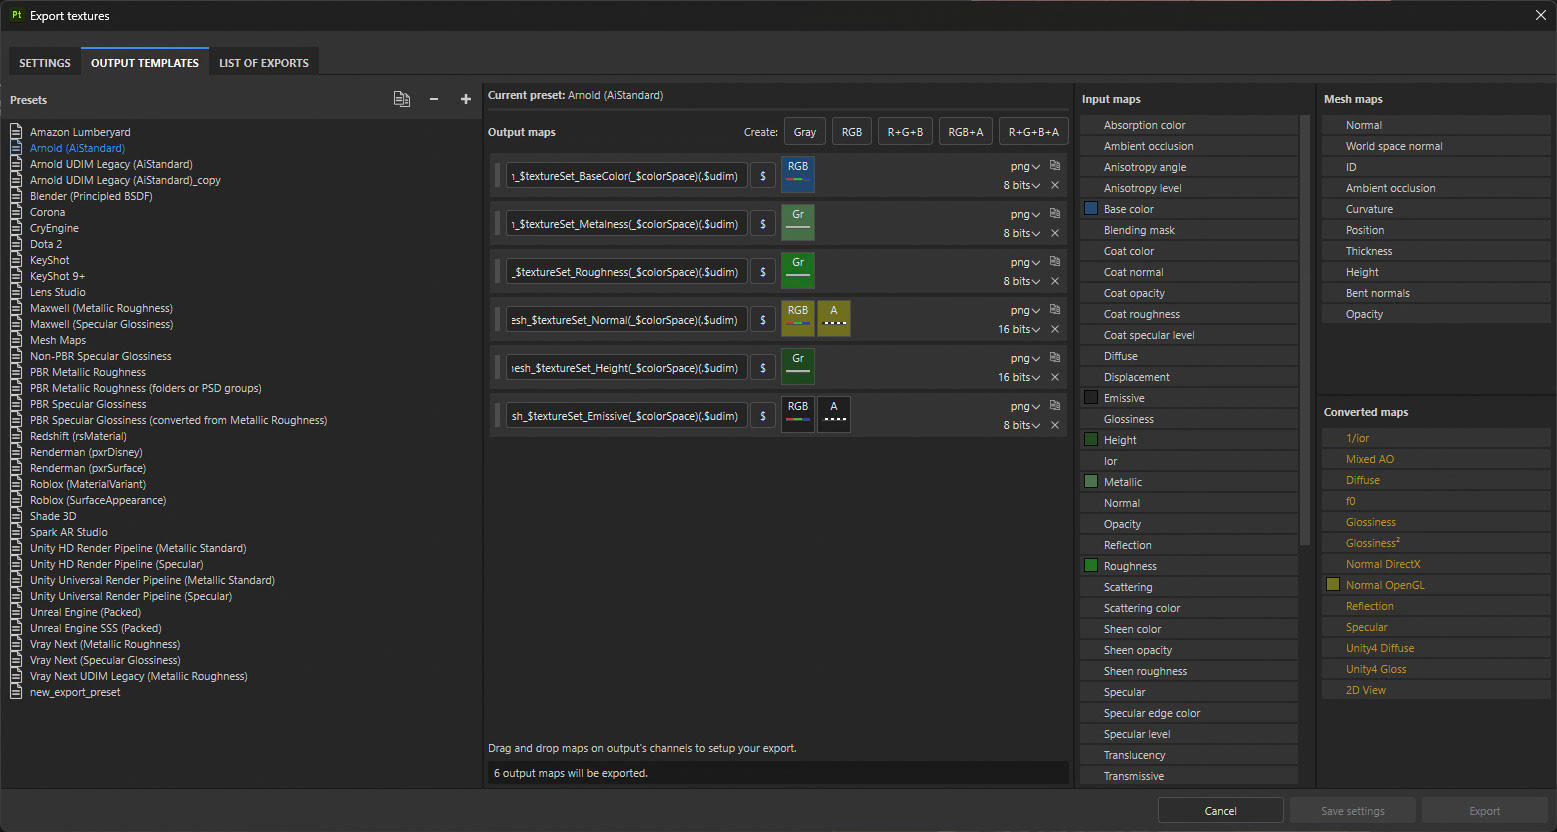
To export textures from Substance Painter, navigate to File → Export Textures. Select the destination folder where the texture files will be saved; this should be located within the sourceimages directory of your Maya project to ensure proper file linking. Set the output resolution to 4K, maintaining consistency with the project’s texture settings.
In the export window, locate the Output Templates section and select Arnold (AiStandard). This template ensures that the exported texture maps are correctly formatted and named for use with Arnold’s AiStandardSurface shader within Maya.
Setting Up Shaders in Maya with Arnold
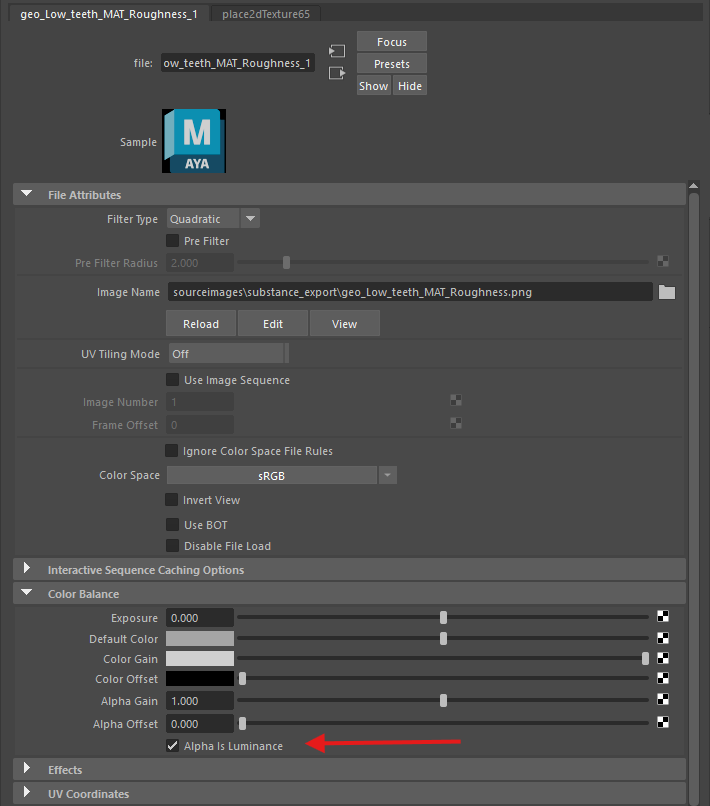
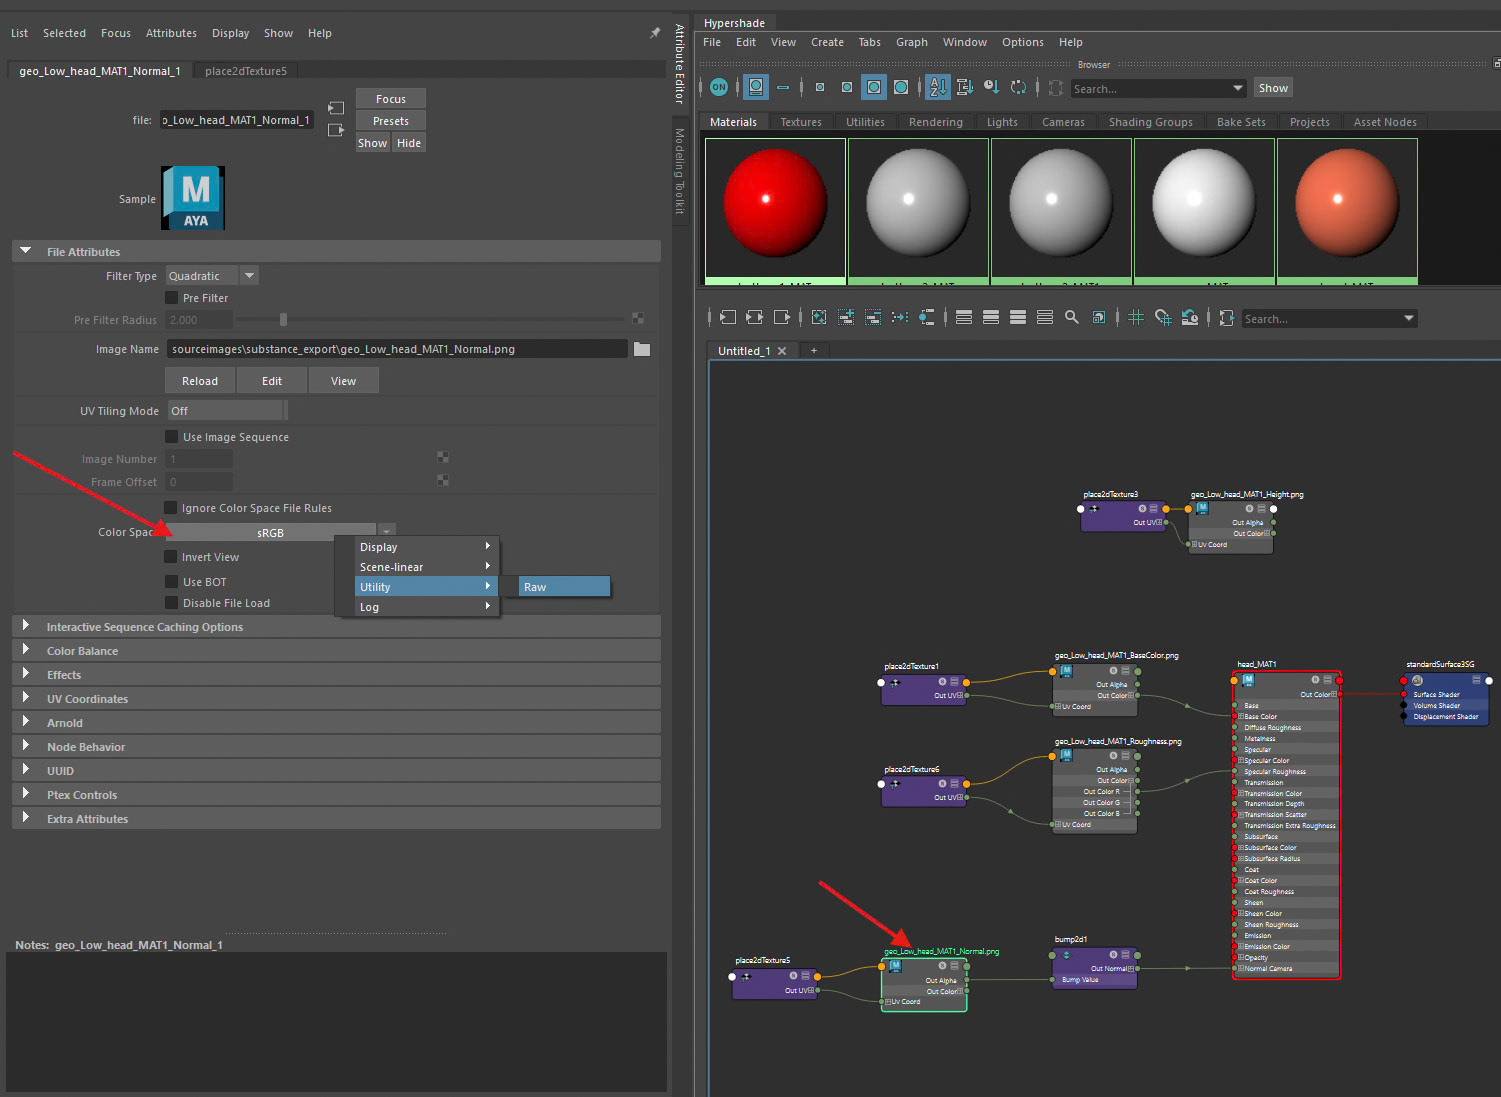
Shaders were set up in Autodesk Maya by dragging and dropping the exported texture maps into the Hypershade. The Base Colour texture was connected to the Base Color input of the AiStandardSurface shader using the RGB output. The Roughness map was connected via the Alpha output, ensuring that Alpha Is Luminance was enabled on the file node.
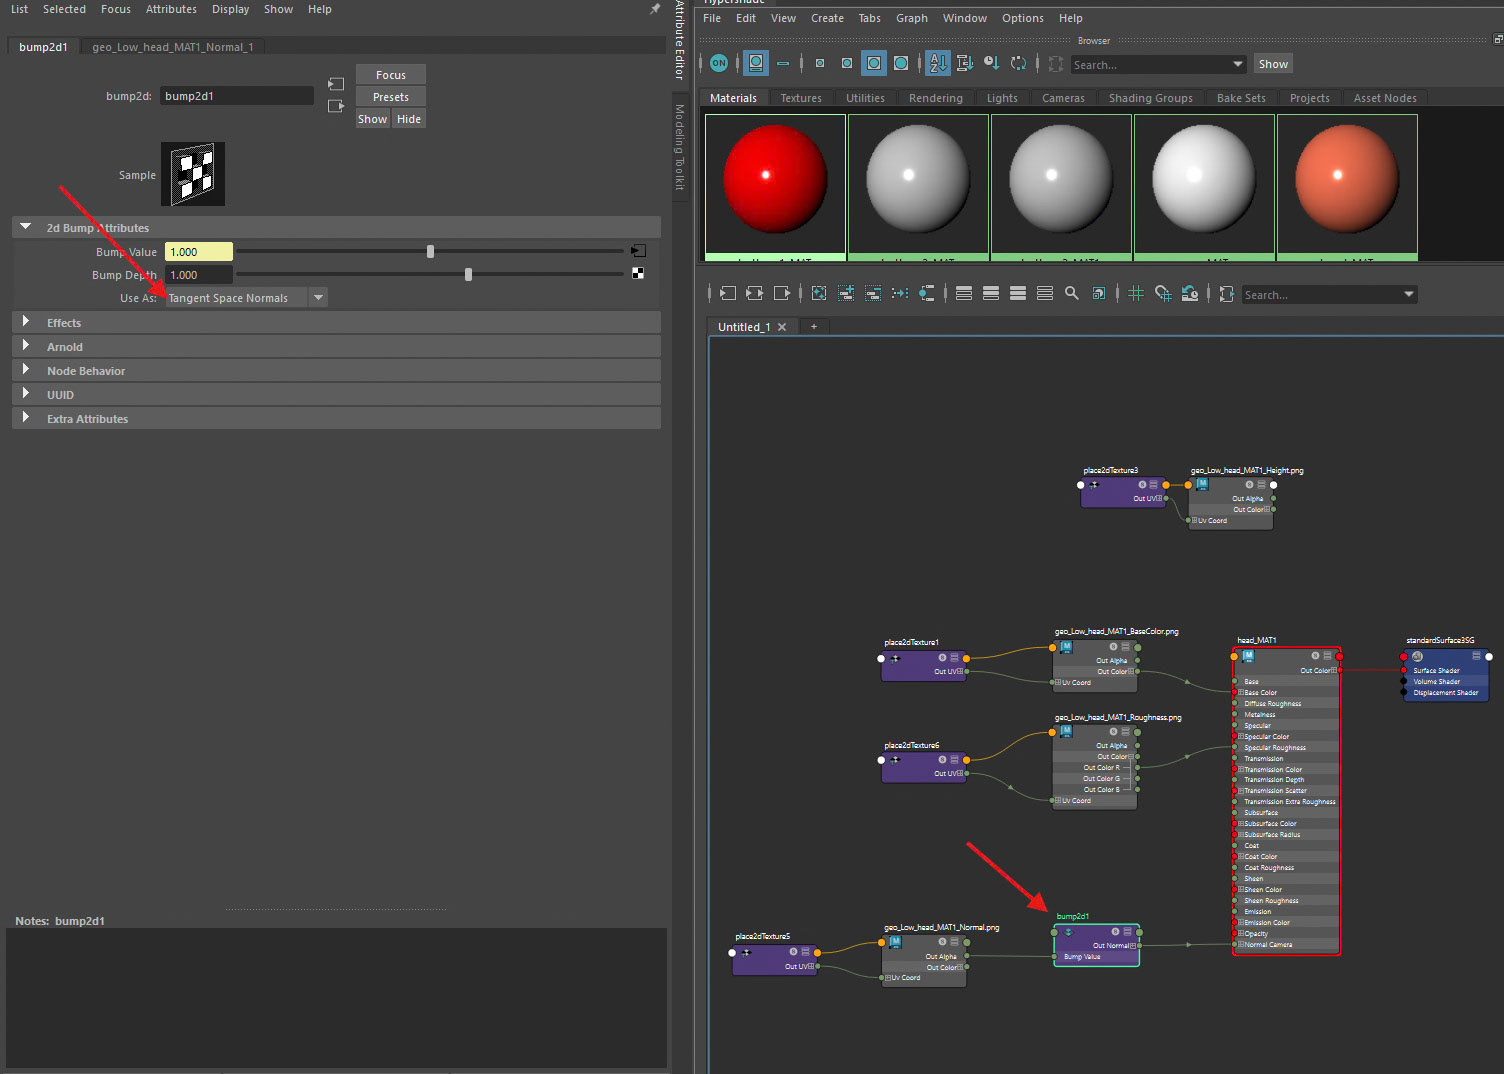
The Normal Map was connected by middle-mouse dragging the texture file into the Bump Mapping slot located in the Geometry section of the shader’s Attribute Editor. Within the resulting Bump2D node, the bump type was set to Tangent Space Normals. Additionally, the Colour Space of the normal map file node was set to Raw to prevent unwanted colour correction and ensure accurate surface shading.
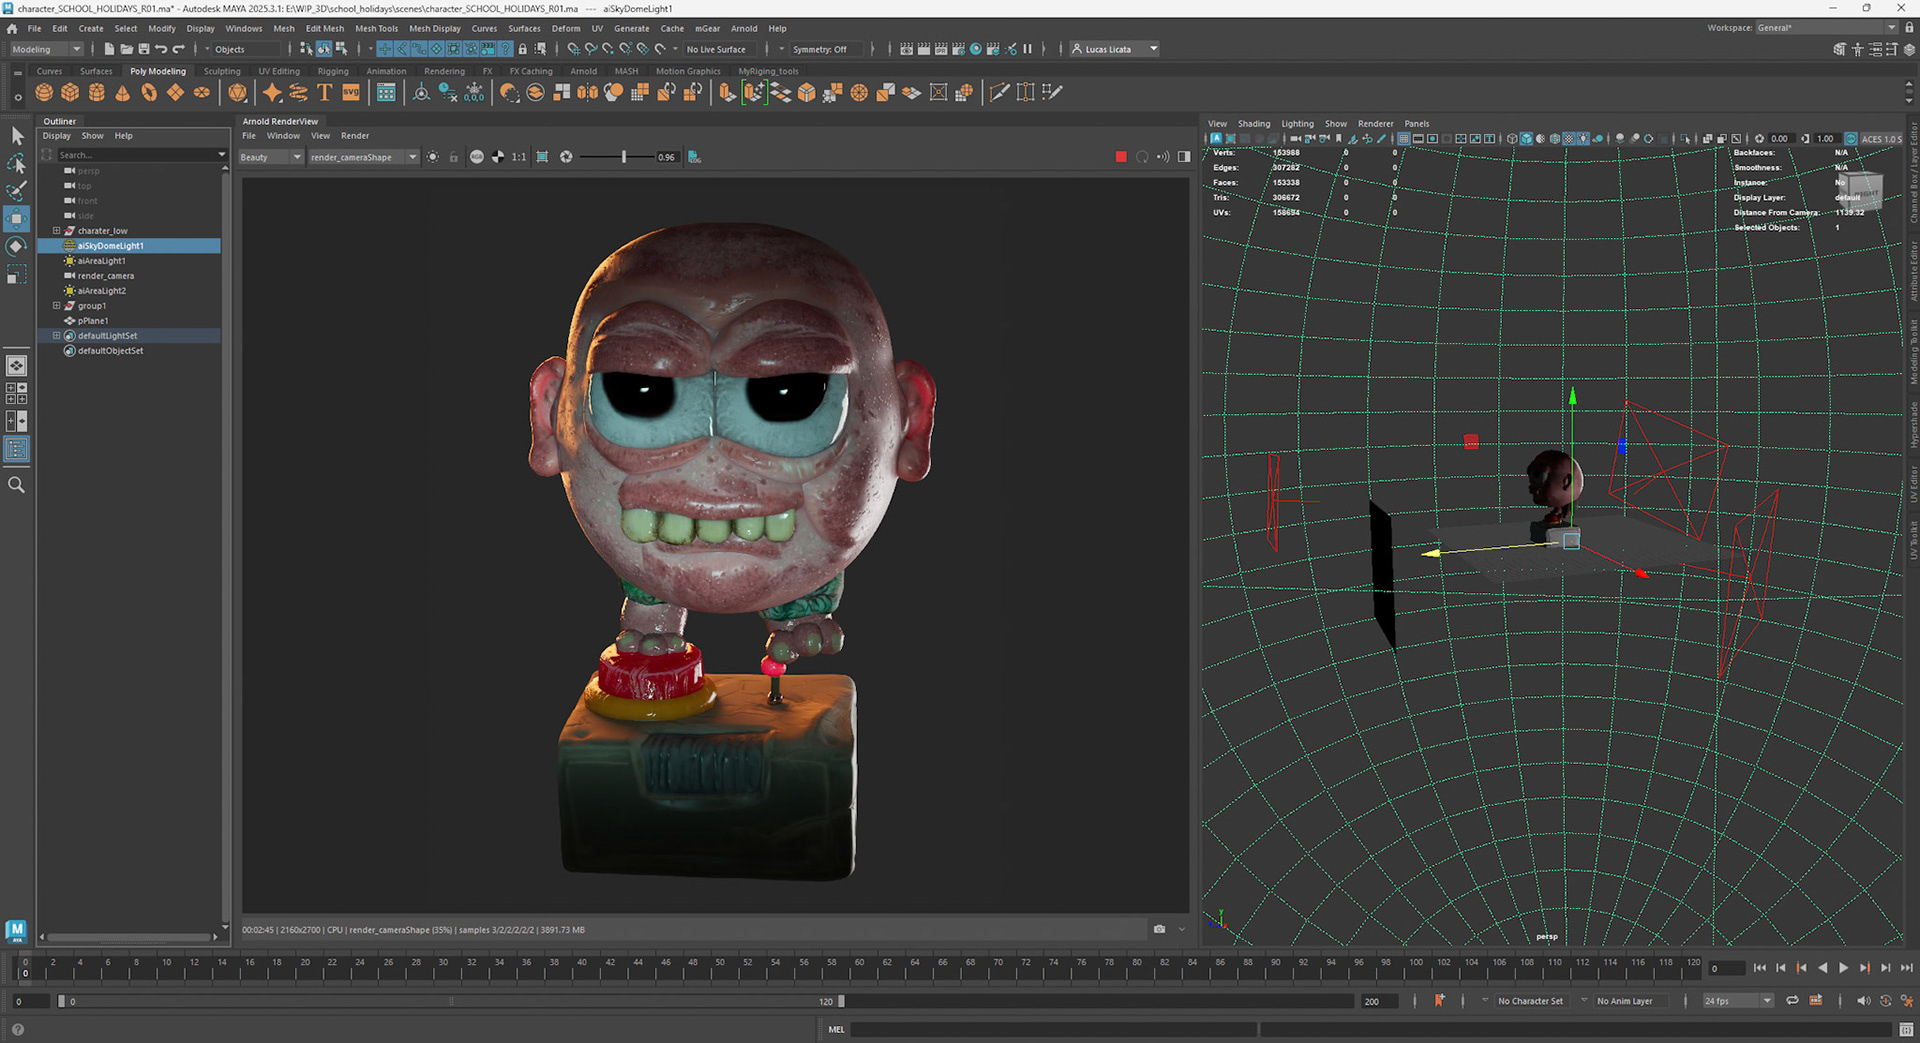
Light and Rendering in Maya using Arnold
Lighting consisted of an Arnold Skydome Light at default intensity, paired with a neutral grey background, and supplemented by a three-point lighting setup. The key light was positioned to represent a screen located directly in front of the character. A warm rim light was placed on the left side of the model, while a cool fill light with a subtle green tint was positioned on the right to evoke the visual qualities of an older, low-cost fluorescent light source. A black card was introduced beneath the joystick to cast a shadow, reducing visual distraction and directing viewer attention back toward the character’s face and eyes.
Final renders were captured using the Arnold RenderView. To export a colour-managed JPG, the image was saved directly from RenderView with colour management enabled, ensuring the output respected Maya’s working colour space (ACES where applicable). The image was saved as a JPG with appropriate exposure and gamma preserved, producing a consistent and accurate result suitable for presentation, documentation, and publication.